TABLE OF CONTENTS
1 —
Safety Instructions / Glossary
2 —
Charge the Headset
3 —
Battery Power Indicators
4 —
Headset Controls
5 —
On / Standby / Off
6 —
Pair Headset with the Phone
7 —
Microphone Positioning
8 —
Make a Call / End a Call
9 —
Answer a Call / End a Call
10 —
Pairing with a Computer
11 —
Operation While Using the Charger/Adapter
12 —
Last Number Redial
12-
Reject a Call
13 —
Voice Dial
13 —
Transfer Audio
14-
Turn Headset Indicator Lights Off/On
14-
Automatic Bluetooth Connection
15-
Multiple Device Pairing
16-
Reset Paired Devices List
17-
Specifi cations
3
BATTERY POWER INDICATORS
Indicator Lights
After the initial 12 hour charge, the indicator lights will
indicate the level of battery power as follows.
Green light: Fully charged. Up to 16 hours talk time.
Green & red lights together: Approximately 60 seconds
away from full charge.
Red light: Less than a full charge.
Keep charger plugged into headset when not in use to
TIPS
avoid battery drain. It’s not necessary for the charger to
be plugged into a power source to take advantage of this.
For best performance, keep charging headset when not in use.
6
PAIR HEADSET WITH THE PHONE
Keep headset & phone no less than 3 inches and no more than
3 feet apart while pairing. Keep other Bluetooth devices at
least 50 ft. away or turn them off. Note: The headset can be
paired with up to 3 different devices.
1. Turn headset off (panel 5).
2. Hold down the headset’s MFB until the red and blue lights
fl ash and you hear 2 rising tones, followed by 4 more tones.
Important: Wait for all tones and for both lights to fl ash. This
may take up to 15 sec. Release the MFB.
3. Follow the manufacturer’s instructions for putting your
cellular phone into Bluetooth discovery mode.
4. Wait 5-15 sec. while the devices discover each other.
When the phone discovers the headset, select «Pair» and
enter a passcode of 0000 when instructed. When pairing
is complete the headset’s blue light will stop fl ashing and
the phone will prompt you to ‘connect’ to the headset.
Enter «Yes» on the phone to connect to the headset. When
connected, the blue light will fl ash indicating that the
headset is in standby mode ready to receive a call.
9
ANSWER A CALL / END A CALL
In order to answer a call, the headset must be in
standby mode (panel 5).
1. Put headset on. Position the microphone (panel 7).
2. When your cell phone rings, you will hear ring tones
in the headset. Answer the call by quickly pressing the
headset’s MFB and release.
3. To end the call, quickly press the MFB on the
headset and release. You will hear 2 falling tones; the
call will end and the headset will enter standby mode.
1
SAFETY INSTRUCTIONS/GLOSSARY
Avoid hearing damage. Set volume at lowest comfortable level. If
you experience ringing in your ears or people sound muffl ed, stop using
the headset. Avoid turning up volume to block noisy surroundings (it’s
possible to adapt to volume that is too high).
Check with local and state laws regarding cell phone handset usage
while operating a motor vehicle.
Replace only with same or equivalent battery.
Dispose of batteries according to local regulations.
Do not throw batteries in a fi re, as they could explode.
Do not immerse any part of this product in water.
Plastic bags and small parts may cause choking if ingested. Keep
them away from small children and pets.
Use only the power cords included with this product.
Avoid temperatures exceeding 140°F (will cause equipment failure).
GLOSSARY OF TERMS
Paired- Two Bluetooth devices agree to communicate with one another.
On — Headset is on but there is no connection to the phone (red light will
fl ash).
Standby Mode — Headset is on, Bluetooth link is active, the user is not
on a call (blue light will fl ash).
Talk Mode- Headset is being used with the cell phone while the cell
phone is on an active call.
4
HEADSET CONTROLS
Multifunction Button (MFB)
& Indicator Lights
Volume Up
& Microphone Mute
Volume Down
Volume Increase: Quickly press and release the Volume
Up/Mute button. Repeat until desired volume is attained.
Volume Decrease: Quickly press and release the Volume
Down button. Repeat until desired volume is attained.
Microphone Mute/Un-Mute: Hold down the Volume Up/
Mute button for 2 seconds until you hear a beep. A mute
reminder beep will be heard every 10 seconds.
Repeat to un-mute.
7
MICROPHONE POSITIONING
Position microphone near corner of your mouth.
Correct positioning ensures that the noise
cancellation technology works properly. Slight
adjustment of the microphone may help to achieve
optimum performance.
10
PAIRING WITH A COMPUTER
Keep headset & computer no less than 3 inches and no more
than 3 feet apart while pairing. Keep all other Bluetooth
devices at least 50 ft. away or turn them off.
1. Turn headset off (panel 5).
2. Open the computer’s Bluetooth connection manager.
3. Put headset into pairing mode (Panel 6- Step 2).
4. Instruct Bluetooth connection manager application to discover
Bluetooth device. Enter passcode 0000 when prompted.
5. Wait 5-15 seconds while the devices discover each other.
The headset’s blue light will stop fl ashing and the red light
will continue to fl ash. After pairing is complete, the Bluetooth
computer will ‘ring’ the headset. Press and release the MFB
once to establish a Bluetooth link to the computer. Press and
release the MFB again to disconnect from the computer.
Once paired, connection can be made by pressing the volume
down button for 1-2 seconds. Tones will be heard and a
connection should be established.
2
CHARGE THE HEADSET
Select charger cord and
plug it into the charger
port on the headset.
Charge for 12 full hours
before fi rst use.
Note: If you do not use your
headset for a long period of
time, you should repeat this
12
AC Charger
DC Charger
5
ON / STANDBY / OFF
Turn Headset On: Hold down the MFB for 2-3 seconds
until you hear 2 rising tones. The red light will fl ash
once every second.
Standby Mode: After the headset is turned on, it will
attempt to connect to the last device that it was paired
with, putting itself into standby mode. The headset can
also be put into standby mode with a quick press and
release of the MFB. The blue light will fl ash indicating
an active Bluetooth link.
Turn Headset Off (conserves battery power): Hold
down the MFB for 2-3 seconds until you hear 2 falling
tones. A red light will fl ash 4 times and the headset will
turn off.
8
MAKE A CALL / END A CALL
If you have not paired the headset and phone together yet, you
must do so (panel 6).
1. Turn on your cell phone. Be sure the Bluetooth option is
enabled on your phone (refer to your phone’s user guide for
instruction).
2. Put headset on and properly position the microphone
(panel 7). To turn headset on press MFB for 2-3 seconds.
The headset will automatically attempt to connect with the
last device it was paired or connected with. Once connected,
the headset will enter standby mode.
3. Dial the phone and make a call as usual.
4. To end call, quickly press the MFB on the headset and
release. You will hear 2 falling tones; the call will end and
the headset will enter standby mode.
OPERATION WHILE
11
USING THE CHARGER / ADAPTER
The B250-XT headset will operate from battery power or
from the AC or DC charger/adapter.
Note: Do not attach the charger mid-call. This causes the
headset to turn off (call will not be lost).
When the headset is operating from the battery, all indicator
lights and sounds will function as described in this guide.
When the headset is operating from the charger/adapter,
the headset, including the audio indicators will function as
described in this user guide. However the MFB lights will
indicate the battery charge status (see Panel 3).
After the battery is fully charged, the MFB charge light
will turn and stay green as long as the charger/adapter
is connected to the headset. While the headset is fully
charged and the charge light is green, the blue indicator
light will also be on if the headset is powered on.
hour charge.
Failure to charge
less than 12 hours
may result in shorter
talk time.
![]() B250-XT Bluetooth-гарнитура с шумоподавлением
B250-XT Bluetooth-гарнитура с шумоподавлением
Инструкция по эксплуатации
Как сбросить настройки Bluetooth-гарнитуры?
Синий попугай B250-XT
При сбросе гарнитуры Bluetooth список устройств, которые были с ней сопряжены, очищается. Выполните следующие действия для сброса.
- Включите гарнитуру.
- Одновременно нажмите и удерживайте кнопку увеличения громкости и кнопку уменьшения громкости, пока не услышите два низких сигнала.
- Теперь ваша гарнитура сброшена.
Внимание
Когда ваша гарнитура была сброшена, она не перейдет автоматически в режим сопряжения. Вам нужно будет вручную повторно выполнить сопряжение с вашими Bluetooth-устройствами.
Не забудьте удалить предыдущее сопряжение перед повторным сопряжением.
https://www.blueparrott.ca/supportpages/blueparrott-b250-xt/204123/faq/0730c677-8d814620-994f-5b0fc34dcb8a
Документы / Ресурсы
-
Page 1
U S E R G U I D E Compatible with most Bluetooth phones & Bluetooth enabled computers (Windows or Macintosh ® ®… -
Page 3: Table Of Contents
30 FCC Notice to Users 11 Pairing with a Computer Voice Dial 31 IC Notice to 12 Multiple Device Pairing Transfer Audio Canadian Users 13 Multipoint Mode Turn Indicator Lights On/Off 15 Proximity Pairing VXi BlueParrott B250-XT+ User Guide ®…
-
Page 4: Package Contents
PACKAGE CONTENTS 1. B250-XT+ Wireless Headset with Leatherette Ear Cushion 2. Windscreen 3. Foam Ear Cushion 4. Auto (DC) Charger 5. AC Charger 6. User Guide (not shown) VXi BlueParrott B250-XT+ User Guide ®…
-
Page 5: Safety Instructions
Standby Mode: Headset is on, Bluetooth link is active, and the user is not on a call (blue light will flash). Talk Mode: Headset is in use with the cell phone while the cell phone is on an active call (blue light will flash). VXi BlueParrott B250-XT+ User Guide ®…
-
Page 6: Charging The Headset
(less than 3 minutes). When the indicator turns green—and stays green—the unit is fully charged. A fully discharged battery will need approximately 3.5 hours to achieve a complete charge. AC Charger Auto (DC) Charger VXi BlueParrott B250-XT+ User Guide ®…
-
Page 7: Battery Power Indicators
BATTERY POWER INDICATORS While charging, the MFB’s indicator light shows the level of battery power on your B250-XT+ as follows: Green light: Fully charged. Over 20 hours’ talk time. Red light: Less than a full charge. For best performance, keep charging headset when Indicator Light not in use.
-
Page 8: Headset Controls
Volume Volume Down Up/Mute button for 2 seconds until you hear a beep. A mute reminder will be heard every 10 seconds. Repeat button press to un-mute. VXi BlueParrott B250-XT+ User Guide ®…
-
Page 9
Turn Headset Off (conserves battery power): Hold down the MFB for approximately 4–5 seconds until you hear a voice prompt, “Power off.” A red light will flash 4 times and the headset will turn off. VXi BlueParrott B250-XT+ User Guide ®… -
Page 10: Pairing With A Phone
When connected, you will hear the voice prompt, “Your headset is connected,” and the blue light will flash indicating that the headset is in Standby Mode and is ready to make or receive calls. VXi BlueParrott B250-XT+ User Guide ®…
-
Page 11: Pairing With A Computer
7. To disconnect, use the mouse to right click on the headset icon and select “disconnect” or power off the headset. If you select disconnect you should hear the voice prompt, “Your headset is disconnected.” VXi BlueParrott B250-XT+ User Guide ®…
-
Page 12: Multiple Device Pairing
MULTIPLE DEVICE PAIRING The B250-XT+ can pair with up to 8 devices; however, only one device may be connected to the headset at a time, unless the headset is in Multipoint Mode (see page 13). To pair the headset with a Bluetooth cell phone or other Bluetooth device, such as a Bluetooth enabled computer, follow the instructions on pages 10 and 11 of this manual.
-
Page 13: Multipoint Mode
3. You will hear 4 rising tones. 4. Once Multipoint Mode is active, shut the headset off. PAIRING the B250-XT+ HEADSET to the FIRST BLUETOOTH DEVICE 5. Get the first Bluetooth device ready to pair to the headset. 6. Put the headset in Pairing Mode (see page 10).
-
Page 14
11. When the second Bluetooth device is connected, turn it and the headset off. USING TWO BLUETOOTH DEVICES with the B250-XT+ HEADSET 12. Start with the B250-XT+ headset turned off. Turn both Bluetooth devices on, and make sure both are ready to accept the headset connection. -
Page 15: Proximity Pairing
4. The headset lights should now be alternating red and blue. 5. The headset initiates pairing activity, and the user has to accept the incoming pairing invita- tion on the phone. NOTE: This may include entering the pin number “0000” (four zeros). VXi BlueParrott B250-XT+ User Guide ®…
-
Page 16: Microphone Positioning
Slight adjustment of the microphone may help to achieve optimum performance. It is important that the word “TALK” (which is embossed on the microphone housing) is positioned towards your mouth. The word “TALK” is embossed at the base of the microphone VXi BlueParrott B250-XT+ User Guide ®…
-
Page 17: Making A Call
3. Dial the phone and make a call as usual. Or use the headset’s Voice Dial function (page 20) to make a call. 4. To end call, quickly press the MFB on the headset and release. You will hear a voice prompt, “Call terminated.” The call will end and the headset will enter Standby Mode. VXi BlueParrott B250-XT+ User Guide ®…
-
Page 18: Answering A Call
2. When your cell phone rings, you will hear ring tones in the headset. Answer the call by quickly pressing and releasing the headset’s MFB. You will hear 2 rising tones and the MFB will blink blue every second. 3. To end the call, quickly press the MFB on the headset and release. You will hear a voice prompt, “Call terminated,” and the headset will enter Standby Mode. VXi BlueParrott B250-XT+ User Guide ®…
-
Page 19: Operation While Using The Charger/Adapter
OPERATION WHILE USING THE CHARGER / ADAPTER The B250-XT+ headset will operate from battery power or from the AC or DC charger/adapter. NOTE: Do not attach the charger mid-call. This will cause the headset to reset and the call will be sent back to the phone.
-
Page 20: Additional Functions
(if available). VOICE DIAL To use the Voice Dial feature of the cell phone, quickly press the MFB on the headset. A tone will be heard and the phone’s voice dialer should open. Clearly speak the command. Repeat quick press of the MFB to end Voice Dial. The headset must be in Standby Mode to use this feature. More functions on page 17 VXi BlueParrott B250-XT+ User Guide ®…
-
Page 21: Transfer Audio
If the headset was paired with multiple devices and the last connected device is not available (turned off, out of range,etc.), the headset will attempt to connect to the second-to-last device it was connected to, etc. It is also possible to reconnect to the device with a quick press of the headset’s MFB. A tone and the voice prompt,“Your headset is connected,” should be heard. VXi BlueParrott B250-XT+ User Guide ®…
-
Page 22: Reset Paired Devices List
This procedure may be necessary if the headset will not pair or connect to a device. NOTE: Pairing information for devices previously paired with the headset will be lost. Headset will need to be paired to the device after reset has occurred. VXi BlueParrott B250-XT+ User Guide ®…
-
Page 23: Call Waiting/Rejecting A Call
NOTE: Depending on your phone’s programming, you may be able to switch between calls from the phone’s call handling menu. 3. To reject an incoming call while on an active call, press and hold the MFB for 2 seconds. The incoming call will go to voicemail. VXi BlueParrott B250-XT+ User Guide ®…
-
Page 24: Specifications
To replace, simply unscrew the tip of the auto adapter (see photo, right) and remove the fuse (be careful not to lose the spring that is inside). Put new fuse in and screw the tip back on. VXi BlueParrott B250-XT+ User Guide ®…
-
Page 25: Functions & Indicators
Mute (On/Off) Volume Up / 2 seconds NONE NONE seconds while muted Voice Dial MFB / 1 quick press NONE Single tone NONE (Start/End) Last Number Volume Down NONE Single tone NONE Redial (1 second) VXi BlueParrott B250-XT+ User Guide ®…
-
Page 26
(if available) Transfer Audio Volume Down (1-2 seconds) NONE NONE NONE Volume Up/Volume Down Disable LEDs NONE Short tone NONE (quick press) Volume Up/Volume Down Enable LEDs LEDs go on Short tone NONE (quick press) VXi BlueParrott B250-XT+ User Guide ®… -
Page 27
Red light, fast flash “Battery low” @ 20 seconds Incoming Call Hold MFB (press twice) NONE NONE NONE Accept MFB (quick press) NONE NONE NONE Incoming Call/Held Reject Incoming MFB (1-2 seconds) NONE NONE NONE Call/Held VXi BlueParrott B250-XT+ User Guide ®… -
Page 28
4 rising tones NONE Multipoint Mode (quick press) Disable MFB / Vol Up & Vol Down NONE 4 falling tones NONE Multipoint Mode (5-6 seconds) Double flashing Connected A2DP NONE NONE NONE blue MFB VXi BlueParrott B250-XT+ User Guide ®… -
Page 29: Warranty
(1) VXi warrants that your B250-XT+ headset system will be free from defects in material and workmanship for one year from the date of purchase. If, during the first year from the date of purchase, your B250-XT+ headset system fails to work due to a defect in material or workmanship, VXi will repair or replace the product, at its election, free of charge.
-
Page 30: Fcc Notice To Users
(2) This device must accept any interference received, including interference that may cause undesired operation. Users are not permitted to make changes or modify the device in any way. Changes or modifications not approved by VXi Corporation will void the user’s authority to operate the equipment. NOTE: This equipment has been tested and found to comply with the limits for a Class B digital device pursuant to part 15 of the FCC rules.
-
Page 31: Ic Notice To Canadian Users
This device complies with RSS-310 of Industry Canada. Operation is subject to the condition that this device does not cause harmful interference. This Class B digital apparatus complies with Canadian ICES-003 (Cet appareil numérique de la classe best conforme à la norme NMB-003 du Canada). VXi BlueParrott B250-XT+ User Guide ®…
-
Page 32
® VXi Corporation | 271 Locust Street, Dover, NH 03820 USA Toll Free: 800-742-8588 | Phone: 603-742-2888 | www.blueparrott.com PN203109B ©2011 VXi Corporation Printed in China…
Посмотреть инструкция для BlueParrott B250-XT бесплатно. Руководство относится к категории гарнитуры, 1 человек(а) дали ему среднюю оценку 7.5. Руководство доступно на следующих языках: английский. У вас есть вопрос о BlueParrott B250-XT или вам нужна помощь? Задайте свой вопрос здесь
Не можете найти ответ на свой вопрос в руководстве? Вы можете найти ответ на свой вопрос ниже, в разделе часто задаваемых вопросов о BlueParrott B250-XT.
Можно ли с помощью гарнитура совершать звонки без использования рук?
В более новые гарнитуры обычно встроен небольшой микрофон, позволяющий не использовать руки.
Что такое шумоподавление?
Технология шумоподавления обеспечивает снижение уровня окружающего шума.
Когда звук считается слишком громким?
Уровень звука выше 80 децибел может нанести вред слуху. Уровень звука выше 120 децибел может нанести прямое повреждение слуху. Вероятность повреждения слуха зависит от частоты и продолжительности прослушивания.
Инструкция BlueParrott B250-XT доступно в русский?
К сожалению, у нас нет руководства для BlueParrott B250-XT, доступного в русский. Это руководство доступно в английский.
Не нашли свой вопрос? Задайте свой вопрос здесь
Product support: +1-262-732-2109
Mon-Fri 8 a.m. — 8 p.m. EST
Support
Item no:
Model number(s): OTE910
Sales and product information
chevron_right
Discontinued
Sales and product information
chevron_right
Discontinued
?
{{JSON(filter.selected()).title}}

Select the product variant to filter the support content
Select the product variant to filter the support content
chevron_right
Item no:
Model number(s): OTE910
Hi,
How can I help you today?
No results found
| Documentation for download | Language or region | File format | File size | |
|---|---|---|---|---|
|
|
||||
|
Download |
Download app
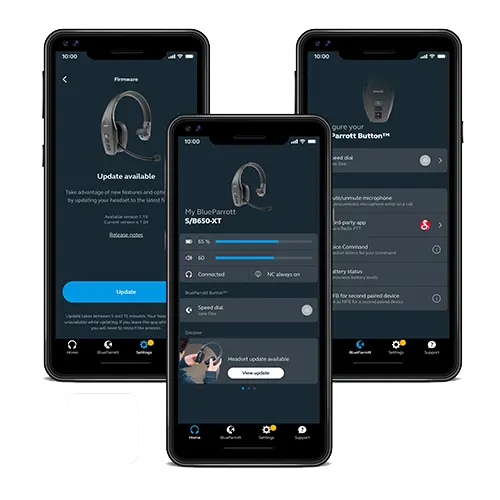
Download the BlueParrott App to your mobile device. Use it to update and customize your {{group.productName}}.

![]()
Firmware
Software
| File description | Language or region | Release date | Version | Release notes | |
|---|---|---|---|---|---|
|
Release notes: Details
|
|||||
|
Details |
Download |
Learn more
-
chevron_right
Serial number/Date code
Find your product serial number/date code