-
Contents
-
Table of Contents
-
Bookmarks
Quick Links
Robustel GoRugged R3000-3P User Guide
Robustel GoRugged R3000-3P
Dual SIM Industrial Cellular VPN Router
For UMTS Network
User Guide
Document Name:
Firmware
:
Date
:
Status
:
Doc ID
:
RT_R3000-3P_UG_v01.03
Confidential
User Guide
1.01.00
2013-05-21
Confidential
RT_R3000-3P_v01.03
1
www.robustel.com
Related Manuals for Robustel GoRugged R3000-3P
Summary of Contents for Robustel GoRugged R3000-3P
-
Page 1
Robustel GoRugged R3000-3P User Guide Robustel GoRugged R3000-3P Dual SIM Industrial Cellular VPN Router For UMTS Network User Guide Document Name: User Guide Firmware 1.01.00 Date 2013-05-21 Status Confidential Doc ID RT_R3000-3P_v01.03 www.robustel.com RT_R3000-3P_UG_v01.03 Confidential… -
Page 2
The contents of this document are subject to revision without notice due to continued progress in methodology, design and manufacturing. Robustel shall have no liability for any error or damage of any kind resulting from the use of this document. -
Page 3
Robustel accepts no responsibility for damages of any kind resulting from delays or errors in data transmitted or received using the router, or for failure of the router to transmit or receive such data. -
Page 4
Robustel GoRugged R3000-3P User Guide caustic / harsh chemicals, dust, or water. Do not try to disassemble or modify the router. There is no user serviceable part inside and the warranty would be void. Do not drop, hit or shake the router. Do not use the router under extreme vibrating conditions. -
Page 5
Robustel GoRugged R3000-3P User Guide Regulatory and Type Approval Information Table 1: Directives Directive of the European Parliament and of the Council of 27 January 2003 on the restriction of the use of certain hazardous substances in electrical and 2002/95/EC… -
Page 6
Robustel GoRugged R3000-3P User Guide Revision History Updates between document versions are cumulative. Therefore, the latest document version contains all updates made to previous versions. Release Date Firmware Version Doc Version Details 2013-01-24 1.00 1.00 First Release. 2013-03-15 1.01 1.01 Update firmware;… -
Page 7: Table Of Contents
Robustel GoRugged R3000-3P User Guide Contents Chapter 1. Product Concept ……………………….1 Overview …………………………1 Packing List …………………………1 Specifications ……………………….. 3 Selection and Ordering Data ……………………5 Chapter 2. Installation …………………………6 LED Indicators ……………………….. 6 Mounting the Router ……………………..6 Install the SIM Card and Micro SD Card …………………
-
Page 8
Robustel GoRugged R3000-3P User Guide 3.31 Configuration -> Syslog ……………………..64 3.32 Administration -> Profile …………………….. 64 3.33 Administration -> Tools ……………………..65 3.34 Administration -> User Management ………………….. 67 3.35 Administration -> Clock ……………………..68 3.36 Administration -> Update Firmware ………………….69 Chapter 4. -
Page 9: Chapter 1. Product Concept
Robustel GoRugged R3000-3P User Guide Chapter 1. Product Concept Overview Robustel GoRugged R3000-3P is a rugged cellular router offering state-of-the-art mobile connectivity for machine to machine (M2M) applications. Dual SIM redundancy for continuous cellular connection, supports 2G/3G. Antenna diversity for improved fringe performance optional.
-
Page 10
Robustel GoRugged R3000-3P User Guide 3-pin pluggable terminal block with lock for power connector x 1 7-pin pluggable terminal block with lock for serial port, I/O and console port x 1 CD with user guide x 1 Note: Please notify your sales representative if any of the above items are missing or damaged. -
Page 11: Specifications
Robustel GoRugged R3000-3P User Guide Ethernet cable x 1 Wall Mounting Kit 35mm Din-Rail mounting kit AC/DC Power Supply Adapter (12VDC, 1.5A) x 1 (EU, US, UK, AU plug optional) Specifications Cellular Interface Standards:UMTS …
-
Page 12
Robustel GoRugged R3000-3P User Guide Serial Interface Number of Ports: 1 x RS-232, 1 x RS-485 ESD Protection: 15KV Parameters: 8E1, 8O1, 8N1, 8N2, 7E2, 7O2, 7N2, 7E1 Baud Rate: 2000bps to 115200bps Flow Control: RTS/CTS, XON/XOFF … -
Page 13: Selection And Ordering Data
Robustel GoRugged R3000-3P User Guide Physical Characteristics Housing & Weight: Metal, 500g Dimension: (L x W x H): 125 x 108 x 45 mm Installation: 35mm Din-Rail or wall mounting or desktop Environmental Limits Operating Temperature & Humidity: -25 to 65°C, 5 to 95% RH Storage Temperature: -40 to 85°C…
-
Page 14: Chapter 2. Installation
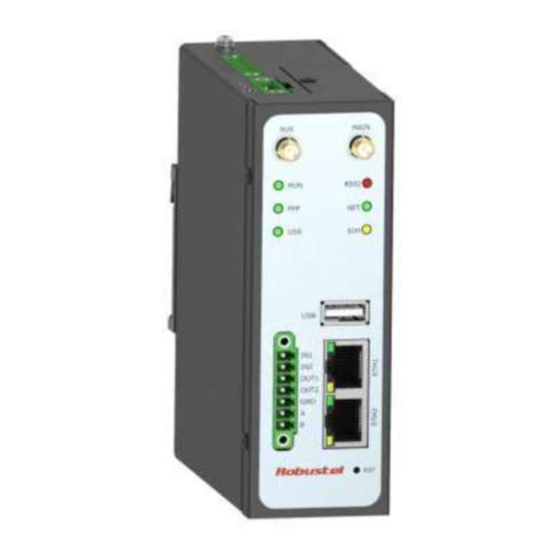
Robustel GoRugged R3000-3P User Guide Chapter 2. Installation LED Indicators Name Color Function Indicating the system status. Blinking: Router is ready. Green On: Router is starting. Off: Router is power off. Indicating the PPP connection status. Green On: PPP connection is established.
-
Page 15: Install The Sim Card And Micro Sd Card
Robustel GoRugged R3000-3P User Guide Or to mount the router on a DIN rail, you need three pcs of M3 screws. Install the SIM Card and Micro SD Card Inserting SIM Card or Micro SD Card Make sure power supply is disconnected.
-
Page 16: Connect The External Antenna (Sma Type)
Robustel GoRugged R3000-3P User Guide Removing SIM Card or Micro SD Card Make sure your charger is disconnected, and then press and hold down the power key until the router is powered off. Press the card until you hear “a cracking sound”, when the card will pop up to be pulled out.
-
Page 17: Pin Assignment For Router
Robustel GoRugged R3000-3P User Guide PIN assignment for Router Debug RS232 Power Digital I/O RS485 Positive Negative Input 1 Input 2 Output 1 Output 2 Data+(A) Data- (B) Note: The power supply range is 12 to 70VDC. Please take care about the polarity, and do not make reverse connection.
-
Page 18: Reset Button
Robustel GoRugged R3000-3P User Guide connection from the ground screw to the grounding surface prior to connecting devices. Note: This product is intended to be mounted to a well-grounded mounting surface, such as a metal panel. Reset Button Reset Button…
-
Page 19: Chapter 3. Configuration Settings Over Web Browser
Robustel GoRugged R3000-3P User Guide Chapter 3. Configuration settings over web browser The router can be configured through your web browser. A web browser is included as a standard application in the following operating systems: Linux, Mac OS, Windows 98/NT/2000/XP/Me/Vista/7/8, etc. The product provides an easy and user-friendly interface for configuration.
-
Page 20
Robustel GoRugged R3000-3P User Guide 4. Select Internet Protocol (TCP/IP) and click Properties. -
Page 21: Factory Default Settings
Robustel GoRugged R3000-3P User Guide 5. Select the Obtain an IP address automatically and Obtain DNS server address automatically radio buttons. 6. Click OK to finish the configuration. Factory Default Settings Before configuring your router, you need to know the following default settings.
-
Page 22: Control Panel
Robustel GoRugged R3000-3P User Guide Control Panel This section allows users to save configuration, reboot router, logout and select language.
-
Page 23: Status -> System
Robustel GoRugged R3000-3P User Guide Control Panel Item Description Button Save Click to save the current configuration into router’s flash. After save the current configuration, router needs to be rebooted to Reboot make the modification taking effect. Logout Click to return to the login page.
-
Page 24
Robustel GoRugged R3000-3P User Guide Item Description Device Model Show the model name of this device Serial Number Show the serial number of this device Device Name Show the device name to distinguish different devices you have installed. Firmware Version… -
Page 25
Robustel GoRugged R3000-3P User Guide Cellular Information Item Description Current SIM Show the SIM card which the router work with currently: SIM1 or SIM2 Phone No. Show the phone number of the current SIM. SMS Service Center Show the SMS Service Center. -
Page 26: Status -> Network
Robustel GoRugged R3000-3P User Guide Status -> Network This section displays the router’s Network status, which include status of Cellular WAN, LAN0 and LAN1. Note: ETH0 WAN information will not be shown if you select “Cellular Only” in “Configuration”->”Link Management”->”WAN Link”.
-
Page 27: Status -> Vpn
Robustel GoRugged R3000-3P User Guide Status -> VPN This section displays the router’s VPN status, including IPSec, L2TP, PPTP, OpenVPN and GRE.
-
Page 28: Status -> Services
Robustel GoRugged R3000-3P User Guide Status -> Services This section displays the router’s Services’ status, including VRRP, DynDNS, and Serial. Status -> Event/Log This section displays the router’s event/log information. You need to enable router to output the log and select the…
-
Page 29: Configuration -> Link Management
Robustel GoRugged R3000-3P User Guide to download diagnose data. Event/Log Item Description Download Select the log messages you want to download. Select the Log level in the drop-down menu: DEBUG, INFO, NOTICE, WARNING, ERR, Log Level CRIT, ALERT, EMERG. 3.10 Configuration -> Link Management This section allows users to set the WAN link and the related parameters.
-
Page 30: Configuration -> Cellular Wan
Robustel GoRugged R3000-3P User Guide 3.11 Configuration -> Cellular WAN This section allows users to set the Cellular WAN and the related parameters. Note: This section will not be displayed if you select “Eth0 Only” in “Configuration”->”Link Management”->”WAN Link”. Basic @Cellular WAN…
-
Page 31
Robustel GoRugged R3000-3P User Guide After click this button, you could input your SIM’s PIN and store the current PIN in its memory, and then enter the PIN automatically each time the system boots up. PIN code request Note: Please ask your local ISP to see whether your SIM card requiring Null PIN or not. -
Page 32
Robustel GoRugged R3000-3P User Guide When router disconnect from cellular network, it will automatically send out SMS Disconnect Reply Null this SMS to specific users (set in the Phone Group). Click to add Phone Group to Set specific users’ phone Book and which… -
Page 33
Robustel GoRugged R3000-3P User Guide… -
Page 34
Robustel GoRugged R3000-3P User Guide Advanced @Cellular WAN Item Description Default Set the SIM card’s phone number, and it will be showed in “Status”->”System”->”System”->”Cellular WAN Information”-“SIM Phone Phone No. Number”. Null In general, you don’t need to set this number because router will read it from the SIM card automatically. -
Page 35: Configuration -> Ethernet
Robustel GoRugged R3000-3P User Guide ISP Profile This section allow users to preset some ISP profiles which will be shown in the selection list of “Configuration”->”Cellular WAN”->”Network Provider Type”. Cellular WAN @ Basic Item Description Default Input the ISP’s name which will be shown in the selection list of Null “Configuration”->”Cellular WAN”->”Network Provider Type”.
-
Page 36
Robustel GoRugged R3000-3P User Guide LAN Interface Enable DHCP Server @ Enable to make router can lease IP address to DHCP clients which Enable DHCP Server connect to Eth0/Eth1. 192.168.0.2/ IP Pool Start, IP Pool End Define the beginning (IP Pool Start) and end (IP Pool End) of the pool of 192.168.0.10… -
Page 37: Configuration -> Serial
Robustel GoRugged R3000-3P User Guide 3.13 Configuration -> Serial This section allows users to set the serial parameters. RS232 @ Serial Item Description Default Select from “300”, “600”, “1200”, “2400”, “4800”, “9600”, “19200”, “38400”, Baud-rate 115200 “57600” , “115200”and “230400”.
-
Page 38
Robustel GoRugged R3000-3P User Guide Transparent The serial port will queue the data in the buffer and send the data to the Cellular Interval Timeout WAN/Ethernet WAN when it reaches the Interval Timeout in the field. @Transparent Note: Data will also be sent as specified by the packet length or delimiter settings even when data is not reaching the interval timeout in the field. -
Page 39
Robustel GoRugged R3000-3P User Guide Over COM router will occupy /dev/ttyUSB0 and /dev/ttyUSB2 for dialing up to . Note: Enable this function will disable Cellular WAN function. /dev/tt COM Name Show the virtual com name of the module inside. yUSB1… -
Page 40
Robustel GoRugged R3000-3P User Guide RS485 @ Serial Item Description Default Select from “300”, “600”, “1200”, “2400”, “4800”, “9600”, “19200”, “38400”, Baud-rate 115200 “57600” , “115200”and “230400”. Data bit Select from “7” and “8”. Parity Select from “None”, “Odd” and “Even”. -
Page 41
Robustel GoRugged R3000-3P User Guide and send the data to the Cellular WAN/Ethernet WAN when a specific character, entered in hex format, is received. A second delimiter character may be enabled and specified in the Delimiter 2 field, so that both characters act as the delimiter to control when data should be sent. -
Page 42: Configuration -> Usb
Robustel GoRugged R3000-3P User Guide 3.14 Configuration -> USB This section allows users to set the USB parameters. Item Description Default Enable automatic update Click Enable to automatically update the configuration file of R3000-3P when Disable of configuration insert the USB storage devices which has R3000-3P’s configuration file.
-
Page 43: Configuration -> Nat/Dmz
Robustel GoRugged R3000-3P User Guide 3.15 Configuration -> NAT/DMZ This section allows users to set the NAT/DMZ parameters. Port Forwarding @ NAT/DMZ Defaul Item Description Manually defining a rule in the router to send all data received on some range…
-
Page 44: Configuration -> Firewall
Robustel GoRugged R3000-3P User Guide 3.16 Configuration -> Firewall This section allows users to set the firewall parameters. Filter Basic Settings @ Firewall Item Description Default Remote Access Using Enable to allow users to access the router remotely on the internet side via HTTP.
-
Page 45: Configuration -> Ip Routing
Robustel GoRugged R3000-3P User Guide Port. Select from “TCP”, “UDP”, “TCP&UDP”, “ICMP” or “ALL”. Protocol If you don’t know what kinds of protocol of your application, we recommend you select “ALL”. Note: You can use “-“ to define a range of IP addresses or ports, e.g. 1.1.1.1-2.2.2.2, 10000-12000.
-
Page 46
Robustel GoRugged R3000-3P User Guide RIP @ IP Routing Item Description Default RIP (Routing Information Protocol) is a distance-vector routing protocol, which employs the hop count as a routing metric. RIP prevents routing loops by Null implementing a limit on the number of hops allowed in a path from the source to a destination. -
Page 47
Robustel GoRugged R3000-3P User Guide Network List Router will only report the RIP information in this list to its neighbor. Null Network Address Enter the Network address which Eth0 or Eth 1 connects directly. Null Netmask Enter the Network’s Netmask which Eth0 or Eth 1 connects directly. -
Page 48: Configuration -> Dyndns
Robustel GoRugged R3000-3P User Guide 3.18 Configuration -> DynDNS This section allows users to set the DynDNS parameters. DynDNS Item Description Default The Dynamic DNS function allows you to alias a dynamic IP address to a static hoastmen, allowing users whose ISP does not assign them a static IP address to use a domain name.
-
Page 49
Robustel GoRugged R3000-3P User Guide IPSec Tunnel @ IPSec Item Description Default Click Add to add new IPSec Tunnel Null Enable Enable IPSec Tunnel, the max tunnel account is 3 Null IPSec Gateway Enter the address of remote side IPSec VPN server. -
Page 50
Robustel GoRugged R3000-3P User Guide dynamically, the IKE negotiation mode must be aggressive. In this case, SAs can be established as long as the username and password are correct. Select from “DES”, “3DES”, “AES128”, “AES192” and “AES256”to be used in IKE negotiation. -
Page 51
Robustel GoRugged R3000-3P User Guide Parameter Note: When negotiating to set up IPSec SAs, IKE uses the smaller one between the lifetime set locally and the lifetime proposed by the peer. Set the interval after which DPD is triggered if no IPSec protected packets is received from the peer. -
Page 52
Robustel GoRugged R3000-3P User Guide X.509 @ IPSec Item Description Default Select Cert Type Select the IPSec tunnel which the certification used for. Null Click “Browse” to select the correct CA file from your PC, and then click “Import” to import it to the router. -
Page 53: Configuration -> Open Vpn
Robustel GoRugged R3000-3P User Guide 3.20 Configuration -> Open VPN This section allows users to set the Open VPN parameters.
-
Page 54
Robustel GoRugged R3000-3P User Guide Client @ Open VPN Item Description Default Enable Enable OpenVPN Client, the max tunnel account is 3 Null Protocol Select from “UDP” and “TCP Client” which depends on the application. UDP Enter the remote IP address or domain name of remote side OpenVPN… -
Page 55
Robustel GoRugged R3000-3P User Guide Server @ Open VPN Item Description Default Enable OpenVPN Tick to enable OpenVPN server tunnel. Disable Server Tunnel_OpenVPN_ Tunnel name Name the OpenVPN server tunnel. You can enter the IP address of cellular WAN, Ethernet WAN or Listen IP Ethernet LAN. -
Page 56
Robustel GoRugged R3000-3P User Guide Select from four different kinds of authentication ways: “Pre-shared”, Authentication None “Username/Password”, “X.509 cert” and “X.509 cert+user”. Local IP Define the local IP address of OpenVPN tunnel. 10.8.0.1 Remote IP Define the remote IP address of OpenVPN tunnel. -
Page 57
Robustel GoRugged R3000-3P User Guide X.509 @ Open VPN Item Description Default Select Cert Type Select the OpenVPN client or server which the certification used for. Null Click “Browse” to select the correct CA file from your PC, and then click “Import”… -
Page 58: Configuration -> Gre
Robustel GoRugged R3000-3P User Guide Click “Export” you can export the TA file from router to your PC. Click “Browse” to select the correct CRL file from your PC, and then click “Import” to import it to the router. Null Click “Export”…
-
Page 59: Configuration -> L2Tp
Robustel GoRugged R3000-3P User Guide 3.22 Configuration -> L2TP This section allows users to set the L2TP parameters. L2TP Client @ L2TP Item Description Default Please add L2TP Client Click “Add” to add a L2TP client. You can add at most 3 L2TP clients.
-
Page 60
Robustel GoRugged R3000-3P User Guide Address/Control Used for PPP initialization. In general, you need to enable it as default. Enable Compression Protocol Field Used for PPP initialization. In general, you need to enable it as default. Enable Compression One of the L2TP initialization strings. In general, you don’t need to modify this… -
Page 61
Robustel GoRugged R3000-3P User Guide L2TP Server @ L2TP Item Description Default Enable L2TP Server Tick to enable L2TP server. Disable Username Set the username which will assign to L2TP client. Null Password Set the password which will assign to L2TP client. -
Page 62
Robustel GoRugged R3000-3P User Guide One of the L2TP initialization strings. In general, you don’t need to modify this Asyncmap Value ffffffff value. Maximum Receiving Unit. It is the identifier of the maximum size of packet, 1500 which is possible to receive in a given environment. -
Page 63: Configuration -> Pptp
Robustel GoRugged R3000-3P User Guide 3.23 Configuration -> PPTP This section allows users to set the PPTP parameters. PPTP Client @ PPTP Item Description Default Enable Enable PPTP Client. The max tunnel accounts are 3. Null Disable Disable PPTP Client.
-
Page 64
Robustel GoRugged R3000-3P User Guide within a specified period of time, it retransmits the PPP echo. If it receives no response from the peer after transmitting the PPP echo for max retries times, it considers that the PPTP tunnel is down and tries tore-establish a tunnel with the peer. -
Page 65
Robustel GoRugged R3000-3P User Guide Local IP Set the IP address of PPTP server. 10.0.0.1 IP Pool Start Set the IP pool start IP address which will assign to the PPTP clients. 10.0.0.2 IP Pool End Set the IP pool end IP address which will assign to the PPTP clients. -
Page 66: Configuration -> Snmp
Robustel GoRugged R3000-3P User Guide 3.24 Configuration -> SNMP This section allows users to set the SNMP parameters. Basic @ SNMP Item Description Default Port UDP port for sending and receiving SNMP requests. Agent Mode Select the correct agent mode.
-
Page 67: Configuration -> Vrrp
Robustel GoRugged R3000-3P User Guide View @ SNMP Item Description Default View Name Enter the View Name Null View Filter Select from “Include” and “Exclude”. Include View OID Enter the Object Identifiers (OID) Null VACM @ SNMP Item Description Default…
-
Page 68: Configuration -> At Over Ip
Robustel GoRugged R3000-3P User Guide A virtual IP address is shared among the routers, with one designated as the master router and the others as backups. In case the master fails, the virtual 192.168.0. Virtual IP IP address is mapped to a backup router’s IP address. (This backup becomes the master router.)
-
Page 69: Configuration -> Sms
Robustel GoRugged R3000-3P User Guide Phone Group Group Name Set the Group Name. Null Phone List Show the phone list in the Group. Null Add or remove the Click right arrow to add the phone no.to this group; Click left arrow to remove phone no.to/from…
-
Page 70: Configuration -> Reboot
Robustel GoRugged R3000-3P User Guide Send SMS on PPP Enable to send SMS to specific user when router disconnect PPP connection. Disable disconnect Phone Group Select the Phone Group you set in 3.2.27 Configuration -> Phone Book Null Enable @ SMS Control Click to enable SMS remote control.
-
Page 71: Configuration -> Portal
Robustel GoRugged R3000-3P User Guide Send reply short message after auto Call reboot from specified Caller ID (e.g. SMS Reply Content Reboot ok!). Null Note: Only support text format SMS. 3.30 Configuration -> Portal This section allows users to set the Portal parameters. Users can configure this section to select relevant server platform to manager numbers of remote devices.
-
Page 72: Configuration -> Syslog
Robustel GoRugged R3000-3P User Guide 3.31 Configuration -> Syslog This section allows users to set the syslog parameters. Syslog Item Description Default Select the save position from “None”, “Flash” and “SD”. “None” means syslog is Save Position NONE only saved in RAM, and will be cleared after reboot.
-
Page 73: Administration -> Tools
Robustel GoRugged R3000-3P User Guide Import: Click “Browse” to select the XML file in your computer, then click “Import” to import this file into your router. XML Configuration Null Export: Click “Export” and the configuration will be showed in the new popup browser window, then you can save it as a XML file.
-
Page 74
Robustel GoRugged R3000-3P User Guide AT Debug AT Debug @ Tools Item Description Default Send AT Commands Enter the AT commands which you need to send to cellular module in this box. Null Send Click this button to send the AT commands. -
Page 75: Administration -> User Management
Robustel GoRugged R3000-3P User Guide Timeout Specify timeout of Traceroute request. Click this button to start Traceroute request, and the log will be displayed in the Send Null follow box. 3.34 Administration -> User Management This section allows users to modify or add management user accounts.
-
Page 76: Administration -> Clock
Robustel GoRugged R3000-3P User Guide Common @ User Management Item Description Default One router has at most 9 common user accounts. There are two access level of Common Null common user account: “ReadWrite” and “ReadOnly”. Select from “ReadWrite” and “ReadOnly”.
-
Page 77: Administration -> Update Firmware
Robustel GoRugged R3000-3P User Guide 3.36 Administration -> Update Firmware This section allows users to update the firmware of router. Update Firmware Item Description Default Firmware Version Show the current firmware version. Null Click “Select File” button to select the correct firmware in your PC, and then click Update firmware “Update”…
-
Page 78: Chapter 4. Examples Of Configuration
Robustel GoRugged R3000-3P User Guide Chapter 4. Examples of configuration Cellular Dial-Up This section shows users how to configure the parameters of Cellular Dial-up which are with two different policies “Always Online” and “Connect on Demand”. Note: This section will be hidden if user selects “Eth0 Only” in “Configuration ->Link Management”.
-
Page 79
Robustel GoRugged R3000-3P User Guide The modifications will take effect after click “Apply” button. If a customized SIM card is using, please select “Custom” instead of “Auto” in “Network Provider Type”, and some relative settings should be filled in manually. -
Page 80: Nat
Robustel GoRugged R3000-3P User Guide Select the trigger policy you need. Note If you select multiple trigger policies, the router will be triggered under anyone of them. This section shows users how to set the NAT configuration of router. Parameter Remote IP defines if access is allowed to route to the Forwarded IP and Port via WAN IP and “Arrives At…
-
Page 81
Robustel GoRugged R3000-3P User Guide Configuration—>NAT/DMZ—>Port Forwarding Note This section will be hidden if user selects “Cellular as primary and if fail use Eth0” in “Configuration ->Link Management”. Explanations for above diagram: If there are two IP addresses 58.1.1.1 and 59.1.1.1 for the External Devices, that the result will be different from the test when the NAT is working at R3000-3P. -
Page 82: L2Tp
Robustel GoRugged R3000-3P User Guide L2TP L2TP_SERVER: Configuration—>L2TP—>L2TP Server Tick “Enable L2TP Server”, and fill in the blank textbox The modification will take effect after “Apply—>Save—>Reboot”.
-
Page 83: Pptp
Robustel GoRugged R3000-3P User Guide Note The following diagrams with red color numbers mean these are the matches between server and client, and with the blue color number means it must be set locally for the tunnel. L2TP_CLIENT: Configuration—>L2TP—>L2TP Client Click “Add”…
-
Page 84
Robustel GoRugged R3000-3P User Guide PPTP_SERVER: Configuration—>PPTP—>PPTP Server Tick “Enable PPTP Server”, and fill in the blank textbox The modification will take effect after “Apply—>Save—>Reboot”. PPTP_CLIENT: Configuration—>PPTP—>PPTP Client Click “Add” button, and fill in the blank textbox… -
Page 85: Ipsec Vpn
Robustel GoRugged R3000-3P User Guide The modification will take effect after “Apply—>Save—>Reboot”. IPSEC VPN Note The following diagrams with red color numbers mean these are the matches between server and client, and with the blue color number means it must be set locally for the tunnel.
-
Page 86
Robustel GoRugged R3000-3P User Guide Note Polices 1,4,6,7 are default for Cisco router and do not display at the CMD IPsecVPN_CLIENT: Configuration—>IPSec—>IPSec Basic Then click “Apply”. Configuration—>IPSec—>IPSec Tunnel Tick “Enable IPSec Tunnel1”… -
Page 87
Robustel GoRugged R3000-3P User Guide The modification will take effect after “Apply—>Save—>Reboot”. -
Page 88: Openvpn
Robustel GoRugged R3000-3P User Guide OPENVPN Note: The following diagrams with red color numbers mean these are the matches between server and client, and with the blue color number means it must be set locally for the tunnel. OPENVPN_SERVER: Configuration—>OpenVPN—>Server…
-
Page 89
Robustel GoRugged R3000-3P User Guide The modifications will take effect after click “Apply—>Save—>Reboot”. OPENVPN_CLIENT: Configuration—>OpenVPN—>Client Tick “Enable OpenVPN Client1”, and fill in the blank textbox… -
Page 90: Sms Remote Control
Robustel GoRugged R3000-3P User Guide The modification will take effect after “Apply—>Save—>Reboot”. SMS Remote Control R3000-3P supports remote control via SMS. An SMS command has following structure: Password:cmd1,a,b,c;cmd2,d,e,f;cmd3,g,h,i;…;cmdn,j,k,n SMS command Explanation: Password: SMS control password is configured at Basic‐>SMS Control‐>Password, which is an optional parameter.
-
Page 91
Robustel GoRugged R3000-3P User Guide Description Syntax Comments Control Commands if no password, please use command «cmd», or use command» password: 0001 Reset Device cmd» cmd1 + cmd2: cmd1;cmd2 * — means can be null 0002 Save Parameters Save Parameters and… -
Page 92: Chapter 5. Introductions For Cli
Robustel GoRugged R3000-3P User Guide Chapter 5. Introductions for CLI What’s CLI and hierarchy level Mode The R3000-3P command-line interface (CLI) is a software interface providing another way to set the parameters of equipment from the console or through a telnet network connection. Before using them…
-
Page 93
Robustel GoRugged R3000-3P User Guide PRIVILEDGED EXEC MODE: R3000-3P> enable Password: ***** R3000-3P# ? //check what commands can be used in Privileged exec mode debug Debug configure information enable Turn on privileged commands exit Exit from current mode export Export file using tftp… -
Page 94: How To Configure The Cli
Robustel GoRugged R3000-3P User Guide INTERFACE MODE: R3000-3P(config)# interface Ethernet 0 //check what commands can be used in interface mode R3000-3P(config-e0)# ? exit Exit from current mode Exit to Normal mode Set the IP address of an interface Set the IP address of an interface How to configure the CLI Following is a list about the description of help and the error should be encountered in the configuring program.
-
Page 95
Robustel GoRugged R3000-3P User Guide R3000-3P> enable Password: ***** R3000-3P# R3000-3P# tftp 172.16.3.3 get rootfs R3k.1.01.00.02_130325 Tftp transfering tftp succeeded!downloaded R3000-3P# write //save current configuration Building configuration… R3000-3P# reload !Reboot the system ?’yes’or ‘no’:yes //reload to take effect Example 3: Set link-management R3000-3P>… -
Page 96
Robustel GoRugged R3000-3P User Guide R3000-3P# R3000-3P# show link-management //show current link-management ********************************************* wan link : Eth0 Only // now “Eth0 Only” as wan-link ICMP primary server : 8.8.8.8 ICMP second server : 8.8.8.4 ICMP detection interval : 30 seconds… -
Page 97
Robustel GoRugged R3000-3P User Guide ********************************************* wan link : Cellular Only // now “Cellular Only” as wan-link ICMP primary server : 8.8.8.8 ICMP second server : 8.8.8.4 ICMP detection interval : 30 seconds ICMP detection timeout : 3 seconds ICMP detection retries… -
Page 98
Robustel GoRugged R3000-3P User Guide SIM 1 parameters: network provider : Auto dial numbers : *99***1# pin code : NULL connection Mode : Always online redial interval : 30 seconds max connect try main SIM select : SIM_1 when connect fail… -
Page 99: Commands Reference
Robustel GoRugged R3000-3P User Guide Commands reference commands syntax description Debug Debug parameters Turn on or turn off debug function Export Export parameters Export vpn ca certificates Import Import parameters Import vpn ca cerfiticates Syslog syslog Export log information to tftp server…
-
Page 1: User Guide
User Guide R3000 Industrial Dual SIM Cellular VPN Router 2 Eth + 1 RS-232 + 1 RS-485 + 1 USB Host Guangzhou Robustel Technologies Co., Limited www.robustel.com…
-
Page 2
The contents of this document are subject to change without notice due to continued progress in methodology, design and manufacturing. Robustel shall have no liability for any error or damage of any kind resulting from the use of this document. -
Page 3
Robustel accepts no responsibility for damages of any kind resulting from delays or errors in data transmitted or received using the router, or for failure of the router to transmit or receive such data. -
Page 4
Robustel GoRugged R3000 User Guide Protecting Your Router To ensure error-free usage, please install and operate your router with care. Do remember the following: Do not expose the router to extreme conditions such as high humidity / rain, high temperature, direct sunlight, … -
Page 5
Robustel GoRugged R3000 User Guide Regulatory and Type Approval Information Table 1: Directives 2011/65/EC Directive 2011/65/EU of the European Parliament and of the Council of 8 June 2011 on the restriction of the use of certain hazardous substances in electrical and… -
Page 6
Robustel GoRugged R3000 User Guide Document History Updates between document versions are cumulative. Therefore, the latest document version contains all updates made to previous versions. Date Firmware Version Doc Version Change Description 27 March, 2017 3.0.0 v.4.0.0 Initial release RT_UG_R3000_v.4.0.0… -
Page 7: Table Of Contents
Robustel GoRugged R3000 User Guide Contents Chapter 1 Product Concept ……………………..8 Key Features …………………………. 8 Package Contents ……………………….9 Specifications ……………………….11 Dimensions …………………………. 13 Ordering Information ……………………..14 Chapter 2 Hardware Installation ……………………15 LED Indicators ……………………….15 PIN Assignment ……………………….
-
Page 8
Robustel GoRugged R3000 User Guide 3.25 Services > DDNS ……………………….94 3.26 Services > SSH……………………….95 3.27 Services > GPS ……………………….96 3.28 Services > Web Server ……………………..99 3.29 Services > Advanced ……………………..100 3.30 System > Debug ……………………….102 3.31… -
Page 9: Chapter 1 Product Concept
Robustel GoRugged R3000 User Guide Chapter 1 Product Concept 1.1 Key Features Robustel GoRugged R3000 is a rugged cellular router offering state-of-the-art mobile connectivity for machine to machine (M2M) applications. Supports WWAN1, WWAN2, Ethernet WAN, WLAN WAN link backup and ICMP detection …
-
Page 10: Package Contents
1 x 7-pin pluggable terminal block with lock for serial port, I/O and console port 1 x Quick Start Guide with download link of other documents or tools Note: If any of the above items is missing or damaged, please contact your Robustel sales representative. RT_UG_R3000_v.4.0.0 27 March, 2017…
-
Page 11
Robustel GoRugged R3000 User Guide Optional accessories (sold separately): SMA cellular antenna (3G/4G) RP-SMA Wi-Fi antenna (stubby antenna or magnet antenna optional) Stubby antenna Magnet antenna Wall mounting kit 35 mm DIN rail mounting kit … -
Page 12: Specifications
Robustel GoRugged R3000 User Guide AC/DC power adapter (12V DC, 1.5 A; EU/US/UK/AU plug optional) 1.3 Specifications Cellular Interface Number of ports: 2 (AUX + MAIN) Connector: SMA, female Standards: GSM/GPRS/EDGE/UMTS/TD-SCDMA/HSPA+/LTE GSM: max DL/UL = 9.6/2.7 Kbps GPRS: max DL/UL = 86 Kbps EDGE: max DL/UL = 236.8 Kbps…
-
Page 13
Management: Web, CLI, SNMP v1/v2/v3, SMS, RobustLink Serial port: TCP Client/Server, UDP, Modbus RTU/ASCII to Modbus TCP, Virtual COM (COM port redirector) RobustLink: a centralized M2M management platform developed by Robustel RobustVPN: a Cloud VPN Portal developed by Robustel … -
Page 14: Dimensions
Robustel GoRugged R3000 User Guide Power Supply and Consumption Connector: 5 mm terminal block with lock Input voltage: 9 to 60V DC Power consumption: Idle: 100 mA@12 V Data link: 400 mA (peak) @12 V Physical Characteristics Ingress protection: IP30 …
-
Page 15: Ordering Information
Robustel GoRugged R3000 User Guide 1.5 Ordering Information Model No. Frequency Bands Operating Environment R3000-3P HSPA+ Router (Mini PCIe) -40 to 85°C/5 to 95% RH HSDPA/HSUPA/HSPA+: 800/850/900/AWS/1900/2100 MHz GSM/GPRS/EDGE: 850/900/1800/1900 MHz R3000-4L LTE Router (Mini PCIe) -40 to 85°C/5 to 95% RH…
-
Page 16: Chapter 2 Hardware Installation
Robustel GoRugged R3000 User Guide Chapter 2 Hardware Installation 2.1 LED Indicators Name Color Status Description Green On, fast blinking Router is powered on (the system is initializing) (250 mSec blink time) On, slow blinking Router starts operating (500 mSec blink time)
-
Page 17: Pin Assignment
Robustel GoRugged R3000 User Guide module found but AT command failed no SIM card inserted110 need to enter the PIN code need to enter the PUK code registration failed no module found not support the module Note: You can choose the display type of USR LED. For more details, please refer to 3.29 Service > Advanced.
-
Page 18: Usb Interface
Robustel GoRugged R3000 User Guide 2.3 USB Interface Function Operation Firmware USB interface is used for batch firmware upgrading, but upgrade cannot be used for sending or receiving data from slave devices which connected to it. You can insert a USB storage device into the router’s USB interface, such as a U disk or a…
-
Page 19: Ethernet Ports
Robustel GoRugged R3000 User Guide 2.5 Ethernet Ports R3000 Router has two Ethernet ports, including ETH0 and ETH1. Each Ethernet port has two LED indicators (refer to the left figure). The yellow one is Link Indicator, while the green one is Speed Indicator. For details about status, see the table below.
-
Page 20
Robustel GoRugged R3000 User Guide To remove slot cover, loosen the screws associated with the cover by using a screwdriver and then find the SIM card slot/SD card slot. To insert SIM card/Micro SD card, press the card with finger until you hear a click and then tighten the screws associated with the cover by using a screwdriver. -
Page 21: Attach External Antenna (Sma Type)
Robustel GoRugged R3000 User Guide 2.7 Attach External Antenna (SMA Type) Attach the SMA external antenna to the router’s connector and twist tightly. Make sure the antenna is within the correct frequency range provided by the ISP and with 50 Ohm impedance.
-
Page 22
Robustel GoRugged R3000 User Guide DIN rail mounting DIN rail size (measured in mm) Use 3 pcs of M3*6 flat head Phillips screws to fix the DIN rail to the router, and then hang the DIN rail on the mounting bracket. It is necessary to choose a standard bracket. -
Page 23: Ground The Router
Robustel GoRugged R3000 User Guide 2.9 Ground the Router Router grounding helps prevent the noise effect due to electromagnetic interference (EMI). Connect the router to the site ground wire by the ground screw before powering on. Ground Screw Note: This product is appropriate to be mounted on a sound grounded device surface, such as a metal panel.
-
Page 24: Power Supply
Robustel GoRugged R3000 User Guide 2.11 Power Supply R3000 Router supports reverse polarity protection, but always refers to the figure above to connect the power adapter correctly. There are two cables associated with the power adapter. Following to the color of the head, connect the cable marked red to the positive pole through a terminal block, and connect the yellow one to the negative in the same way.
-
Page 25: Chapter 3 Initial Configuration
Robustel GoRugged R3000 User Guide Chapter 3 Initial Configuration The router can be configured through your web browser that including IE 8.0 or above, Chrome and Firefox, etc. A web browser is included as a standard application in the following operating systems: Linux, Mac OS, Windows 98/NT/2000/XP/Me/Vista/7/8, etc.
-
Page 26
Robustel GoRugged R3000 User Guide Click Properties in the window of Local Area Connection Status. Choose Internet Protocol Version 4 (TCP/IPv4) and click Properties. RT_UG_R3000_v.4.0.0 27 March, 2017 25/136 Confidential… -
Page 27
Robustel GoRugged R3000 User Guide Two ways for configuring the IP address of PC Obtain an IP address automatically: Use the following IP address: (Configured a static IP address manually within the same subnet of R3000 Router) Click OK to finish the configuration. -
Page 28: Factory Default Settings
Robustel GoRugged R3000 User Guide 3.2 Factory Default Settings Before configuring your router, you need to know the following default settings. Item Description Username admin Password admin ETH0 192.168.0.1/255.255.255.0, LAN mode ETH1 192.168.0.1/255.255.255.0, LAN mode DHCP Server Enabled 3.3 Log in the Router To log in to the management page and view the configuration status of your router, please follow the steps below.
-
Page 29: Control Panel
Robustel GoRugged R3000 User Guide 3.4 Control Panel After logging in, the home page of the R3000 Router’s web interface is displayed, for example. Using the original password to log in the router, the page will pop up the following tab It is strongly recommended for security purposes that you change the default username and/or password.
-
Page 30: Status
Robustel GoRugged R3000 User Guide Submit Click to save the modification on current configuration page. Cancel Click to cancel the modification on current configuration page. Note: The steps of how to modify configuration are as bellow: Modify in one page;…
-
Page 31: Internet Status
Robustel GoRugged R3000 User Guide Firmware Version Show the firmware version running on the router. Hardware Version Show the current hardware version. Kernel Version Show the current kernel version. Serial Number Show the serial number of your device. Internet Status…
-
Page 32: Interface > Link Manager
Robustel GoRugged R3000 User Guide 3.6 Interface > Link Manager This section allows you to setup the link connection. General Settings @ Link Manager Item Description Default Primary Link Select from “WWAN1”, “WWAN2”, “WAN” or “WLAN”. WWAN1 WWAN1: Select to make SIM1 as the primary wireless link …
-
Page 33
Robustel GoRugged R3000 User Guide Link Settings allows you to configure the parameters of link connection, including WWAN1/WWAN2, WAN and WLAN. It is recommended to enable Ping detection to keep the router always online. The Ping detection increases the reliability and also costs the data traffic. -
Page 34
Robustel GoRugged R3000 User Guide The window is displayed as below when disabling the “Automatic APN Selection” option. Link Settings (WWAN) Item Description Default General Settings Index Indicate the ordinal of the list. Type Show the type of the link. -
Page 35
Robustel GoRugged R3000 User Guide Link Settings (WWAN) Item Description Default WWAN Settings Automatic APN Click the toggle button to enable/disable the “Automatic APN Selection” Selection option. After enabling, the device will recognize the access point name automatically. Alternatively, you can disable this option and manually add the access point name. -
Page 36
Robustel GoRugged R3000 User Guide Link Settings (WWAN) Item Description Default Overrided Primary Override primary DNS will override the automatically obtained DNS. Null Overrided Secondary Override secondary DNS will override the automatically obtained DNS. Null Debug Enable Click the toggle button to enable/disable this option. Enable for debugging information output. -
Page 37
Robustel GoRugged R3000 User Guide The window is displayed as below when choosing “PPPoE” as the connection type. Link Settings (WAN) Item Description Default General Settings Index Indicate the ordinal of the list. Type Show the type of the link. -
Page 38
Robustel GoRugged R3000 User Guide Connection Type Select from “DHCP”, “Static” or “PPPoE”. DHCP Static Address Settings IP Address Set the IP address with Netmask which can access the internet. Null IP address with Netmask, e.g. 192.168.1.1/24 Gateway Set the gateway of the IP address in WAN port. -
Page 39
Robustel GoRugged R3000 User Guide WLAN Router will obtain IP automatically from the WLAN AP if choosing “DHCP” as the connection type. The specific parameter configuration of SSID is shown as below. The window is displayed as below when choosing “Static” as the connection type. -
Page 40
Robustel GoRugged R3000 User Guide Link Settings (WLAN) Item Description Default General Settings Index Indicate the ordinal of the list. Type Show the type of the link. WLAN Description Enter a description for this link. Null Connection Type Select from “DHCP” or “Static”. -
Page 41
Robustel GoRugged R3000 User Guide Secondary DNS Set the secondary DNS. Null Ping Detection Settings Enable Click the toggle button to enable/disable the ping detection mechanism, a keepalive policy of R3000 Router. Primary Server Router will ping this primary address/domain name to check that if the 8.8.8.8… -
Page 42
Robustel GoRugged R3000 User Guide Click the row of the link, and it will show the details information of the current link connection under the row. Click the button to clear SIM1 or SIM2 monthly data traffic usage statistics. Data statistics will be displayed only if enable the Data Allowance function in Interface >… -
Page 43: Interface > Lan
Robustel GoRugged R3000 User Guide 3.7 Interface > LAN This section allows you to set the related parameters for LAN port. There are two LAN ports on R3000 Router, including ETH0 and ETH1. The default settings of ETH0 and ETH1 are lan0, and their default IP are 192.168.0.1/255.255.255.0.
-
Page 44
Robustel GoRugged R3000 User Guide The window is displayed as below when choosing “Server” as the mode. The window is displayed as below when choosing “Relay” as the mode. Item Description Default DHCP Settings Enable Click the toggle button to enable/disable the DHCP function. -
Page 45
Robustel GoRugged R3000 User Guide Item Description Default IP Pool End Define the end of the pool of IP addresses which will be leased to 192.168.0.100 DHCP clients. Subnet Mask Define the subnet mask of IP address obtained by DHCP clients from 255.255.255.0… -
Page 46
Robustel GoRugged R3000 User Guide IP Settings Item Description Default Index Indicate the ordinal of the list. Interface Show the editing port, read only. lan0 IP Address Set the multiple IP address of the LAN port. Null Netmask Set the multiple Netmask of the LAN port. -
Page 47: Interface > Ethernet
Robustel GoRugged R3000 User Guide Status This section allows you to view the status of LAN connection. Click the row of status, the details status information will be display under the row. Please refer to the screenshot below. 3.8 Interface > Ethernet This section allows you to set the related parameters for Ethernet.
-
Page 48
Robustel GoRugged R3000 User Guide This section introduces you to set the parameters of the WAN port. Click button of eth0 to configure its parameters. The port assignment can be changed by selecting from the drop down list. Port Settings… -
Page 49: Interface > Cellular
Robustel GoRugged R3000 User Guide This column allows you to view the status of Ethernet port. Click the row of status, the details status information will be display under the row. Please refer to the screenshot below. 3.9 Interface > Cellular This section allows you to set the related parameters of Cellular.
-
Page 50
Robustel GoRugged R3000 User Guide The window is displayed as below when choosing “Auto” as the network type. The window is displayed as below when choosing “Specify” as the band select type. Cellular Item Description Default General Settings RT_UG_R3000_v.4.0.0 27 March, 2017… -
Page 51
Robustel GoRugged R3000 User Guide Cellular Item Description Default Index Indicate the ordinal of the list. SIM Card Set the currently editing SIM card. SIM1 Phone Number Enter the phone number of the SIM card. Null PIN Code Enter a 4-8 characters PIN code used for unlocking the SIM. -
Page 52
Robustel GoRugged R3000 User Guide Click the row of status, the details status information will be displayed under the row. Status Item Description Index Indicate the ordinal of the list. Modem Status Show the status of the radio module. Modem Model Show the model of the radio module. -
Page 53: Interface > Wi-Fi
Robustel GoRugged R3000 User Guide Status Item Description IMEI Show the IMEI (International Mobile Equipment Identity) number of the radio module. Firmware Version Show the current firmware version of the radio module. This page allows you to check the AT Debug.
-
Page 54
Robustel GoRugged R3000 User Guide Click the Access Point column to configure the parameters of Wi-Fi AP. By default, the security mode is set as “Disabled”. The window is displayed as below when setting “WPA” as the security mode. RT_UG_R3000_v.4.0.0… -
Page 55
Robustel GoRugged R3000 User Guide The window is displayed as below when setting “WEP” as the security mode. General Settings @ Access Point Item Description Default Enable Click the toggle button to enable/disable the Wi-Fi access point option. Band Choose from “2.4G” or “5G”. -
Page 56
Robustel GoRugged R3000 User Guide General Settings @ Access Point Item Description Default Broadcast SSID Click the toggle button to enable/disable the SSID being broadcast. When enabled, the client can scan your SSID. When disabled, the client cannot scan your SSID. If you want to connect to the router AP, you need to manually enter the SSID of router AP at Wi-Fi client side. -
Page 57
Robustel GoRugged R3000 User Guide Click to add a MAC address to the Access Control List. The maximum count for MAC address is 64. Item Description Default General Settings Enable ACL Click the toggle button to enable ACL (Access Control List) option. -
Page 58
Robustel GoRugged R3000 User Guide Wi-Fi Client Configure R3000 as Wi-Fi client Click Interface > Wi-Fi > Wi-Fi, select “Client” as the mode and click “Submit”. And then a “WLAN” column will appear under the Interface list. Click Interface > Link Manager > Link Settings, and click the edit button of WLAN, then configure the related parameters of WLAN. -
Page 59: Interface > Usb
Robustel GoRugged R3000 User Guide This window allows you to scan for all the available SSIDs in your area and click one of those shown on the “Scan Results” list. 3.11 Interface > USB This section allows you to set the USB parameters. The USB interface of R3000 Router can be used for firmware upgrade and configuration upgrade.
-
Page 60: Interface > Di/Do
Robustel GoRugged R3000 User Guide R3000 has the key for USB automatic update. User can generate the key in this page. Item Description Default USB Automatic Update Click to generate a key, and click to download the key. 3.12 Interface > DI/DO This section allows you to set the DI/DO parameters.
-
Page 61
Robustel GoRugged R3000 User Guide The window is displayed as below when choosing “Counter” as the mode. General Settings @ DI Item Description Default Index Indicate the ordinal of the list. Enable Click the toggle button to enable/disable this DI. -
Page 62
Robustel GoRugged R3000 User Guide Click to enter the DO configuration window. The window is displayed as below when choosing “Pulse” as the alarm on action. RT_UG_R3000_v.4.0.0 27 March, 2017 61/136 Confidential… -
Page 63
Robustel GoRugged R3000 User Guide The window is displayed as below when choosing “Pulse” as the alarm off action. Item Description Default Index Indicate the ordinal of the list. Enable Click the toggle button to enable/disable this DO. Alarm On Action Digital Output initiates when there is an alarm. Selected from “High”, “Low” or High “Pulse”. -
Page 64: Interface > Serial Port
Robustel GoRugged R3000 User Guide Item Description Default square wave as specified in the pulse mode parameters. The low level widths are specified here. Enter from 1 to 30000 ms. High-level Set the high-level width. It is available when enabling Pulse as “Alarm On Width Action/Alarm Off Action”.
-
Page 65
Robustel GoRugged R3000 User Guide Click the edit button of COM1. Serial Port Item Description Default Serial Port Application Settings Index Indicate the ordinal of the list. Port Show the current serial’s name, read only. Enable Click the toggle button to enable/disable this serial port. When the status is OFF, the serial port is not available. -
Page 66
Robustel GoRugged R3000 User Guide The window is displayed as below when choosing “Transparent” as the application mode and “TCP Client” as the protocol. The window is displayed as below when choosing “Transparent” as the application mode and “TCP Server” as the protocol. -
Page 67
UDP: Router works as UDP client Robustlink: Router will automatically upload the serial data to Robustlink platform under the Robustlink protocol. Robustlink is a management platform from Robustel. This function only available when Router is connects to Robustlink RT_UG_R3000_v.4.0.0… -
Page 68: Network > Route
Robustel GoRugged R3000 User Guide Server Settings Item Description Default Server Address Enter the address of server which will receive the data sent from Null router’s serial port. IP address or domain name will be available. Server Port Enter the specified port of server which is used for receiving the Null serial data.
-
Page 69: Network > Firewall
Robustel GoRugged R3000 User Guide Static Route Item Description Default Index Indicate the ordinal of the list. Description Enter a description for this route. Null Destination Enter the IP address of destination host or destination network. Null Netmask Enter the Netmask of destination host or destination network.
-
Page 70
Robustel GoRugged R3000 User Guide Filtering Item Description Default General Settings Enable Filtering Click the toggle button to enable/disable the filtering option. Default Filtering Policy Select from “Accept” or “Drop”. Cannot be changed when filtering Accept rules table is not empty. -
Page 71: Port Mapping
Robustel GoRugged R3000 User Guide Click to add filtering rule. The maximum count is 20. Filtering Rules Item Description Default Index Indicate the ordinal of the list. Description Enter a description for this filtering rule. Null Source Address Defines if access is allowed from one or a range of IP addresses which are defined Null by Source IP Address, or every IP addresses.
-
Page 72
Robustel GoRugged R3000 User Guide Click to add port mapping rules. The maximum rule count is 40. Port Mapping Rules Item Description Default Index Indicate the ordinal of the list. Description Enter a description for this port mapping. Null Remote IP Specify the host or network which can access to the local IP address. -
Page 73: Network > Ip Passthrough
Robustel GoRugged R3000 User Guide 3.16 Network > IP Passthrough Click Network > IP Passthrough > IP Passthrough to enable or disable the IP Pass-through option. If router enables the IP Pass-through, the terminal device (such as PC) will enable the DHCP Client mode and connect to LAN port of the router;…
-
Page 74
Robustel GoRugged R3000 User Guide Click to add tunnel settings. The maximum count is 3. Tunnel Settings Item Description Default Index Indicate the ordinal of the list. Enable Click the toggle button to enable/disable this IPsec tunnel. Description Enter a description for this IPsec tunnel. -
Page 75
Robustel GoRugged R3000 User Guide The window is displayed as below when choosing “PSK” as the authentication type. The window is displayed as below when choosing “CA” as the authentication type. The window is displayed as below when choosing “xAuth PSK” as the authentication type. -
Page 76
Robustel GoRugged R3000 User Guide The window is displayed as below when choosing “xAuth CA” as the authentication type. IKE Settings Item Description Default Negotiation Mode Select from “Main” and “Aggressive” for the IKE negotiation mode in phase 1. Main If the IP address of one end of an IPsec tunnel is obtained dynamically, the IKE negotiation mode must be aggressive. -
Page 77
Robustel GoRugged R3000 User Guide IKE Settings Item Description Default Remote ID Type Select from “Default”, “FQDN” and “User FQDN” for IKE negotiation. Default Default: Uses an IP address as the ID in IKE negotiation FQDN: Uses an FQDN type as the ID in IKE negotiation. If this option is selected, type a name without any at sign (@) for the local security gateway, e.g., test.robustel.com. -
Page 78
Robustel GoRugged R3000 User Guide SA Settings Item Description Default Encrypt Algorithm Select from “3DES”, “AES128” or “AES256” when you select “ESP” in 3DES “Protocol”. Higher security means more complex implementation and lower speed. DES is enough to meet general requirements. Use 3DES when high confidentiality and security are required. -
Page 79
Robustel GoRugged R3000 User Guide Status This section allows you to view the status of the IPsec tunnel. x509 User can upload the X509 certificates for the IPsec tunnel in this section. x509 Item Description Default X509 Settings Tunnel Name Choose a valid tunnel. -
Page 80: Vpn > Openvpn
Robustel GoRugged R3000 User Guide 3.18 VPN > OpenVPN This section allows you to set the OpenVPN and the related parameters. OpenVPN is an open-source software application that implements virtual private network (VPN) techniques for creating secure point-to-point or site-to-site connections in routed or bridged configurations and remote access facilities R3000 Router supports point-to-point and point-to-points connections.
-
Page 81
Robustel GoRugged R3000 User Guide The window is displayed as below when choosing “Preshared” as the authentication type. RT_UG_R3000_v.4.0.0 27 March, 2017 80/136 Confidential… -
Page 82
Robustel GoRugged R3000 User Guide The window is displayed as below when choosing “Password” as the authentication type. RT_UG_R3000_v.4.0.0 27 March, 2017 81/136 Confidential… -
Page 83
Robustel GoRugged R3000 User Guide The window is displayed as below when choosing “X509CA” as the authentication type. RT_UG_R3000_v.4.0.0 27 March, 2017 82/136 Confidential… -
Page 84
Robustel GoRugged R3000 User Guide The window is displayed as below when choosing “X509CA Password” as the authentication type. General Settings @ OpenVPN Item Description Default Index Indicate the ordinal of the list. Enable Click the toggle button to enable/disable this OpenVPN tunnel. -
Page 85
Robustel GoRugged R3000 User Guide General Settings @ OpenVPN Item Description Default Authentication Type Select from “None”, “Preshared”, “Password”, “X509CA” and “X509CA None Password”. “None” and “Preshared” authentication type are only working with p2p mode. Username Enter the username used for “Password” or “X509CA Password”… -
Page 86
Robustel GoRugged R3000 User Guide Advanced Settings @ OpenVPN Item Description Default Enable HMAC Firewall Click the toggle button to enable/disable this option. Add an additional layer of HMAC authentication on top of the TLS control channel to protect against DoS attacks. -
Page 87: Vpn > Gre
Robustel GoRugged R3000 User Guide @crl.pem Certificate Files Index Indicate the ordinal of the list. Filename Show the imported certificate’s name. Null File Size Show the size of the certificate file. Null Last Modification Show the timestamp of that the last time to modify the certificate file.
-
Page 88: Services > Syslog
Robustel GoRugged R3000 User Guide Local Virtual IP Address Set the local virtual IP address of the GRE tunnel. Null Local Virtual Netmask Set the local virtual Netmask of the GRE tunnel. Null Remote Virtual IP Address Set the remote virtual IP Address of the GRE tunnel.
-
Page 89: Services > Event
Robustel GoRugged R3000 User Guide Syslog Settings Item Description Default Enable Click the toggle button to enable/disable the Syslog settings option. Syslog Level Select from “Debug”, “Info”, “Notice”, “Warning” or “Error”, which from low to Notice high. The lower level will output more syslog in detail.
-
Page 90
Robustel GoRugged R3000 User Guide Click button to add an Event parameters. RT_UG_R3000_v.4.0.0 27 March, 2017 89/136 Confidential… -
Page 91
Robustel GoRugged R3000 User Guide General Settings @ Notification Item Description Default Index Indicate the ordinal of the list. Description Enter a description for this group. Null Sent SMS Click the toggle button to enable/disable this option. When enabled, the router will send notification to the specified phone numbers via SMS if event occurs. -
Page 92: Services > Ntp
Robustel GoRugged R3000 User Guide Event Details Item Description Default Save Position Select the events’ save position from “RAM” or “NVM”. RAM: Random-access memory NVM: Non-Volatile Memory Filter Message Event will be filtered according to the Filter Message that the user set. Click the Null “Refresh”…
-
Page 93: Services > Sms
Robustel GoRugged R3000 User Guide NTP Server Settings Enable Click the toggle button to enable the NTP server option. This window allows you to view the current time of router and also synchronize the router time. Click button to synchronize the router time with PC’s.
-
Page 94: Services > Email
Robustel GoRugged R3000 User Guide User can test the current SMS service whether it is available in this section. SMS Testing Item Description Default Phone Number Enter the specified phone number which can receive the SMS from router. Null Message Enter the message that router will send it to the specified phone number.
-
Page 95: Services > Ddns
Robustel GoRugged R3000 User Guide Email Settings Item Description Default Outgoing server Enter the SMTP server IP Address or domain name. Null Server port Enter the SMTP server port. Timeout Set the max time for sending email to SMTP server. When the server doesn’t receive the email over this time, it will try to resend.
-
Page 96: Services > Ssh
Robustel GoRugged R3000 User Guide Hostname Enter the hostname provided by the DDNS server. Null Username Enter the username provided by the DDNS server. Null Password Enter the password provided by the DDNS server. Null Enter the URL customized by user.
-
Page 97: Services > Gps
Robustel GoRugged R3000 User Guide Keys Management Item Description Authorized Keys Click on “Choose File” to locate an authorized key from your computer, and then click “Import” to import this key into your router. Note: This option is valid when enabling the password logins option.
-
Page 98
Robustel GoRugged R3000 User Guide The window is displayed as below when choosing “TCP Server” as the protocol. The window is displayed as below when choosing “UDP” as the protocol. Server Settings Item Description Default Index Indicate the ordinal of the list. -
Page 99
Robustel GoRugged R3000 User Guide Server Settings Item Description Default Server Address @ UDP Set the address of the TCP Server. Null Server Port @ UDP Set the port of the remote TCP Server. Null Send GGA Sentence Send GGA information in NMEA format. -
Page 100: Services > Web Server
Robustel GoRugged R3000 User Guide 3.28 Services > Web Server This section allows you to modify the parameters of Web Server. Basic @ Web Server Item Description Default HTTP Port Enter the HTTP port number you want to change in router’s Web Server. On a Web server, port 80 is the port that the server «listens to»…
-
Page 101: Services > Advanced
Robustel GoRugged R3000 User Guide number except 443, only adding that port number then you can login R3000’s Web Server. Note: HTTPS is more secure than HTTP. In many cases, clients may be exchanging confidential information with a server, which needs to be secured in order to prevent unauthorized access.
-
Page 102
Robustel GoRugged R3000 User Guide or “WiFi”. None: Meaningless indication, and the LED is off OpenVPN: USR indicator showing the OpenVPN status IPsec: USR indicator showing the IPsec status WiFi: USR indicator showing the Wi-Fi status Note: For more details about USR indicator, see “2.1 LED Indicators”. -
Page 103: System > Debug
Robustel GoRugged R3000 User Guide 3.30 System > Debug This section allows you to check and download the syslog details. Syslog Item Description Default Syslog Details Log Level Select from “Debug”, “Info”, “Notice”, “Warn”, “Error” which from low to high.
-
Page 104: System > Update
Robustel GoRugged R3000 User Guide Click the button to refresh the syslog. Syslog Files Syslog Files List It can show at most 5 syslog files in the list, the files’ name range from message0 to message 4. And the newest syslog file will be placed on the top of the list.
-
Page 105
Robustel GoRugged R3000 User Guide App Center Item Description Default App Install File Click on “Choose File” to locate the App file from your computer, and then click to import this file into your router. Note: File format should be xxx.rpk, e.g. R3000-robustlink-1.0.0.rpk. -
Page 106: System > Tools
Robustel GoRugged R3000 User Guide 3.33 System > Tools This section provides users three tools: Ping, Traceroute and Sniffer. Ping Item Description Default IP address Enter the ping’s destination IP address or destination domain. Null Number of Requests Specify the number of ping requests.
-
Page 107
Robustel GoRugged R3000 User Guide Traceroute Item Description Default Trace Address Enter the trace’s destination IP address or destination domain. Null Trace Hops Specify the max trace hops. Router will stop tracing if the trace hops has met max value no matter the destination has been reached or not. -
Page 108: System > Profile
Robustel GoRugged R3000 User Guide Sniffer Item Description Default Interface Choose the interface according to your Ethernet configuration. Host Filter the packet that contain the specify IP address. Null Packets Request Set the packet number that the router can sniffer at a time.
-
Page 109: System > User Management
Robustel GoRugged R3000 User Guide Ignore Invalid Settings Click the toggle button as “OFF” to ignore invalid settings. XML Configuration File Click on to locate the XML configuration file from your computer, and then click to import this file into your router.
-
Page 110
Robustel GoRugged R3000 User Guide Super User Settings Item Description Default Old Username Enter the old username of your router. The default is “admin”. Null New Username Enter a new username you want to create; valid characters are a-z, A-Z, 0-9, Null @, ., -, #, $, and *. -
Page 111: Chapter 4 Configuration Examples
Robustel GoRugged R3000 User Guide Chapter 4 Configuration Examples 4.1 Interface 4.1.1 Console Port You can use the console port to manage the router via CLI commands, please refer to Chapter 5 Introductions for CLI. 4.1.2 Digital Input R3000 supports digital input with dry contact.
-
Page 112: Digital Output
Robustel GoRugged R3000 User Guide 4.1.3 Digital Output R3000 supports digital output with wet contact. Please refer to the right side figure to connect the negative pole of the power to the port marked “GND”. External The maximum output voltage, output…
-
Page 113: Cellular
Robustel GoRugged R3000 User Guide 4.1.5 RS-485 R3000 supports one RS-485 for serial data communication. Please refer to the connection diagram at the right side. 4.2 Cellular 4.2.1 Cellular Dial-Up This section shows you how to configure the primary and backup SIM card for Cellular Dial-up. Connect the router correctly and insert two SIM, then open the configuration page.
-
Page 114
Robustel GoRugged R3000 User Guide Click the edit button of WWAN1 to set its parameters according to the current ISP. When finished, click Submit > Save & Apply for the configuration to take effect. RT_UG_R3000_v.4.0.0 27 March, 2017 113/136 Confidential… -
Page 115: Sms Remote Control
Robustel GoRugged R3000 User Guide The window is displayed below by clicking Interface > Cellular > Advanced Cellular Settings. Click the edit button of SIM1 to set its parameters according to your application request. When finished, click Submit > Save & Apply for the configuration to take effect.
-
Page 116
Robustel GoRugged R3000 User Guide please refer to Chapter 5 Introductions for CLI. Note: Download the configure XML file from the configured web browser. The format of SMS control command can refer to the data of the XML file. Go to System > Profile > Export Configuration File, click to generate the XML file and click to export the XML file. -
Page 117: Network
Robustel GoRugged R3000 User Guide device_model = R3000 serial_number = 201612221052 uptime = «0 days, 00:39:31» system_time = «Mon Feb 27 09:52:52 2017» admin:admin;reboot In this command, username is “admin”, password is “admin”, and the command is to reboot the Router.
-
Page 118
Robustel GoRugged R3000 User Guide The configuration of server and client is as follows. IPsec VPN_SERVER: Cisco 2811: RT_UG_R3000_v.4.0.0 27 March, 2017 117/136 Confidential… -
Page 119
Robustel GoRugged R3000 User Guide IPsec VPN_CLIENT: The window is displayed as below by clicking VPN > IPsec > Tunnel. Click button and set the parameters of IPsec Client as below. RT_UG_R3000_v.4.0.0 27 March, 2017 118/136 Confidential… -
Page 120
Robustel GoRugged R3000 User Guide When finished, click Submit > Save & Apply for the configuration to take effect. The comparison between server and client is as below. RT_UG_R3000_v.4.0.0 27 March, 2017 119/136 Confidential… -
Page 121: Openvpn
Robustel GoRugged R3000 User Guide 4.3.2 OpenVPN OpenVPN supports two modes, including Client and P2P. Here takes P2P as an example. The configuration of two points is as follows. OPENVPN (P2P): Point 1 The window is displayed as below by clicking VPN > OpenVPN > OpenVPN.
-
Page 122
Robustel GoRugged R3000 User Guide Click button and set the parameters of point1 as below. When finished, click Submit > Save & Apply for the configuration to take effect. RT_UG_R3000_v.4.0.0 27 March, 2017 121/136 Confidential… -
Page 123
Robustel GoRugged R3000 User Guide Point 2 Click button and set the parameters of point2 as below. When finished, click Submit > Save & Apply for the configuration to take effect. RT_UG_R3000_v.4.0.0 27 March, 2017 122/136 Confidential… -
Page 124: Gre Vpn
Robustel GoRugged R3000 User Guide The comparison between point 1 and point 2 is as below. 4.3.3 GRE VPN The configuration of two points is as follows. The window is displayed as below by clicking VPN > GRE > GRE.
-
Page 125
Robustel GoRugged R3000 User Guide GRE-1 : Click button and set the parameters of GRE-1 as below. When finished, click Submit > Save & Apply for the configuration to take effect. GRE-2: Click button and set the parameters of GRE-1 as below. -
Page 126
Robustel GoRugged R3000 User Guide The comparison between GRE-1 and GRE-2 is as below. RT_UG_R3000_v.4.0.0 27 March, 2017 125/136 Confidential… -
Page 127: Chapter 5 Introductions For Cli
Robustel GoRugged R3000 User Guide Chapter 5 Introductions for CLI 5.1 What Is CLI The R3000 command-line interface (CLI) is a software interface providing another way to set the parameters of equipment from the SSH or through a telnet network connection.
-
Page 128: How To Configure The Cli
Robustel GoRugged R3000 User Guide 5.2 How to Configure the CLI Following is a table about the description of help and the error should be encountered in the configuring program. Commands /tips Description Typing a question mark “?” will show you the help information.
-
Page 129
Robustel GoRugged R3000 User Guide Flashing Checking 100% Decrypting 100% Flashing 100% Verifying 100% Verfify Success upgrade success //update success # config save_and_apply // save and apply current configuration, make you configuration effect Example 3: Set link-manager # set # set… -
Page 130
Robustel GoRugged R3000 User Guide # set link_manager primary_link wwan1 //select “wwan1” as primary_link //setting succeed # set link_manager link 1 type Type desc Description connection_type Connection Type wwan WWAN Settings static_addr Static Address Settings pppoe PPPoE Settings ping Ping Settings… -
Page 131
Robustel GoRugged R3000 User Guide mtu = 1500 dhcp { enable = true mode = server relay_server = «» pool_start = 192.168.0.2 pool_end = 192.168.0.100 netmask = 255.255.255.0 gateway = «» primary_dns = «» secondary_dns = «» wins_server = «»… -
Page 132
Robustel GoRugged R3000 User Guide Example 5: CLI for setting Cellular # show cellular all sim { id = 1 card = sim1 phone_number = «» extra_at_cmd = «» network_type = auto band_select_type = all band_gsm_850 = false band_gsm_900 = false… -
Page 133
Robustel GoRugged R3000 User Guide band_wcdma_1900 = false band_wcdma_2100 = false band_lte_800 = false band_lte_850 = false band_lte_900 = false band_lte_1800 = false band_lte_1900 = false band_lte_2100 = false band_lte_2600 = false band_lte_1700 = false band_lte_700 = false band_tdd_lte_2600 = false… -
Page 134: Commands Reference
Robustel GoRugged R3000 User Guide band_lte_1900 LTE 1900 (band 2) band_lte_2100 LTE 2100 (band 1) band_lte_2600 LTE 2600 (band 7) band_lte_1700 LTE 1700 (band 4) band_lte_700 LTE 700 (band 17) band_tdd_lte_2600 TDD LTE 2600 (band 38) band_tdd_lte_1900 TDD LTE 1900 (band 39)
-
Page 135: Glossary
Robustel GoRugged R3000 User Guide Glossary Abbr. Description Alternating Current Access Point Name ASCII American Standard Code for Information Interchange Conformité Européene (European Conformity) CHAP Challenge Handshake Authentication Protocol Command Line Interface for batch scripting Circuit Switched Data Clear to Send…
-
Page 136
Robustel GoRugged R3000 User Guide Abbr. Description L2TP Layer 2 Tunneling Protocol local area network Light Emitting Diode Machine to Machine Maximum Minimum Mobile Originated Mobile Station Mobile Terminated OpenVPN Open Virtual Private Network Password Authentication Protocol Personal Computer Personal Communications Network, also referred to as DCS 1800… -
Page 137
Robustel GoRugged R3000 User Guide Abbr. Description Virtual Private Network VSWR Voltage Stationary Wave Ratio Wide Area Network RT_UG_R3000_v.4.0.0 27 March, 2017 136/136 Confidential… -
Page 138
Robustel GoRugged R3000 User Guide Guangzhou Robustel Technologies Co., Ltd Address: 3rd Floor, Building F, Kehui Park, No.95 Daguan Road, Guangzhou, China 510660 Tel: 086-20-29019902 Email: info@robustel.com RT_UG_R3000_v.4.0.0 27 March, 2017 137/136 Confidential…
Промышленный сотовый маршрутизатор LTE R3000 с двумя SIM-картами

Нормативная информация и информация об утверждении типа
Таблица 1: Директивы
| 2011 / 65 / EU | Европейская директива RoHS2.0 2011/65/EU была выпущена Европейским парламентом и Европейским советом 1 июля 2011 г. об ограничении использования некоторых опасных веществ в электрическом и электронном оборудовании. |
| 4 июня 2015 г. в Официальном журнале Европейского союза была опубликована поправка к директиве RoHS2.0 (ЕС).
В 2015/863 году четыре фталата (DEHP, BBP, DBP, DIBP) были официально включены в список запрещенных веществ в Приложении II RoHS 2.0 (2011/65/EU). С 22 июля 2019 года все электронные и электрические товары, экспортируемые в Европу (кроме медицинского и контрольного оборудования), должны соответствовать этому ограничению; с 22 июля 2021 года медицинское оборудование и оборудование для мониторинга также будет включено в объем контроля. |
|
| 2012 / 19 / EU | Европейская директива WEEE 2012/19/EU была выпущена Европейским парламентом.
и Европейский совет от 24 июля 2012 г. по отходам электрического и электронного оборудования. |
| 2013 / 56 / EU | Европейская директива 2013/56/ЕС – это директива по батареям, опубликованная в официальном бюллетене ЕС 10 декабря 2013 года. Батарейка-таблетка, используемая в этом изделии, соответствует стандарту директивы 2013/56/ЕС. |
Таблица 2: Токсичные или опасные вещества или элементы с установленными пределами концентрации
| Название части | Опасные вещества | |||||||||
| (Пб) | (Рт. Ст.) | (CD) | (Cr (VI)) | (ПБД) | (ПБДЭ) | (ДЭГП) | (ВВР) | (ДАД) | (ДИБП) | |
| Металл
части |
o | o | o | o | – | – | – | – | – | – |
| Цепь
модули |
o | o | o | o | o | o | o | o | o | o |
| Кабели и кабельная сборка
s |
o |
o |
o |
o |
o |
o |
o |
o |
o |
o |
| Пластиковые и полимерные
части |
o |
o |
o |
o |
o |
o |
o |
o |
o |
o |
| o:
Указывает, что это токсичное или опасное вещество, содержащееся во всех однородных материалах для этой детали, ниже предельных требований RoHS2.0. X: Указывает, что это токсичное или опасное вещество содержится по крайней мере в одном из однородных материалов для этой детали. может превышать предельные требования в RoHS2.0. -: Указывает, что он не содержит токсичных или опасных веществ. |
Технические характеристики радио
| Радиочастотные технологии | 2G, 3G, 4G, Wi-Fi*, ГНСС* | |
|
Сотовая частота* |
4G: LTE FDD: B1/B2/B3/B4/B5/B7/B8/B28 LTE TDD: B40
3G: WCDMA: B1 / B2 / B5 / B8 2G: GSM: B2 / B3 / B5 / B8 |
Океания, Южная Америка |
| 4G: LTE FDD: B1/B3/B5/B7/B8/B20 LTE TDD: B38/B40/B41
3G: WCDMA: B1 / B5 / B8 2G: GSM: B3 / B8 |
в регионе EMEA |
|
| Частота Wi-Fi | 2.4 ГГц: 2.412 ~ 2.484 ГГц
5 ГГц: 4.910 ~ 5.825 ГГц |
|
| Максимальная мощность RF | 35 дБм при GSM, 25 дБм при WCDMA, 25.7 дБм при LTE, 18 дБм при Wi-Fi |
- Может варьироваться в зависимости от модели.
Упрощенная декларация соответствия ЕС
Мы, Guangzhou Robustel Co., Ltd., расположенные по адресу: 501, Building #2, 63 Yongan Road, Huangpu District, Guangzhou, China, заявляем, что это радиооборудование соответствует всем применимым директивам ЕС. Полный текст ДоС ЕС доступен по следующему интернет-адресу:
www.robustel.com/certifications/
Декларация соответствия FCC
Это устройство соответствует требованиям части 15 правил FCC. Эксплуатация возможна при соблюдении следующих двух условий:
- Это устройство не может создавать вредные помехи.
- Это устройство должно принимать любые помехи, включая помехи, которые могут вызвать сбои в работе.
IC Декларация о соответствии
Это устройство содержит не требующие лицензии передатчик (и) / приемник (и), которые соответствуют не требующим лицензии RSS Канады в области инноваций, науки и экономического развития. Эксплуатация возможна при соблюдении следующих двух условий:
- Это устройство не должно вызывать помех.
- Это устройство должно принимать любые помехи, включая помехи, которые могут вызвать сбои в работе устройства.
Заявление о воздействии радиочастоты для IC
Это устройство соответствует ограничениям воздействия IC, установленным для неконтролируемой среды. Это устройство должно быть установлено и эксплуатироваться на расстоянии не менее 20 см между радиатором и корпусом.
Дополнительные документы или инструменты по продуктам можно найти по адресу:
www.robustel.com/en/documentations/
Техподдержка
- Теl +86-20-82321505
- Эл. почта: support@robustel.com
- Web: www.robustel.com
История документа
Обновления между версиями документа являются накопительными. Таким образом, последняя версия документа содержит все обновления предыдущих версий.
| Время | Версия прошивки контроллера | Версия документа | изменить описание |
| Август 03, 2022 | 5.0.0 | 1.0.0 | Начальная версия. |
Обзор
Промышленный сотовый VPN-маршрутизатор Robustel с 4 портами Ethernet (R3000 Quad) — это защищенный сотовый маршрутизатор, предлагающий современные мобильные подключения для приложений «машина-машина» (M2M).
Контрольный список пакетов
Перед началом установки убедитесь, что ваш пакет содержит следующие компоненты:
Компоновка панели (может различаться в разных моделях)

Описание интерфейса
Назначение PIN-кода
| PIN-код | Отлаживать | RS-232 | RS-485 | Руководство |
| 1 | CR | — | — | Маршрутизатор ¬ Устройство |
| 2 | CT | — | — | Маршрутизатор ® Устройство |
| 3 | GND | GND | GND | — |
| 4 | — | TXD | Данные+(А) | Маршрутизатор ® Устройство |
| 5 | — | RXD | Данные+(Б) | Маршрутизатор ¬ Устройство |
| 6 | — | РТС | — | Маршрутизатор ® Устройство |
| 7 | — | CTS | — | Маршрутизатор ¬ Устройство |
| PIN-код | Полярность |
| 8 | Положительный |
| 9 | Отрицательный |
| 10 | GND |
Светодиодный индикатор
| Имя и фамилия | Цвет | Статус | Описание |
| БЕГ | Зелёная | горит, быстро мигает
(время мигания 250 мс) |
Маршрутизатор включен (система инициализируется) |
| горит, мигает
(время мигания 500 мс) |
Роутер начинает работать | ||
| от | Роутер выключен | ||
| PPP | Зелёная | горит, твердый | Связь по ссылке работает |
| от | Подключение по ссылке не работает | ||
| USR-OpenVPN | Зелёная | горит, твердый | Соединение OpenVPN установлено |
| от | Соединение OpenVPN не установлено | ||
| USR-IPsec | Зелёная | горит, твердый | Соединение IPsec установлено |
| от | Соединение IPsec не установлено | ||
| УСР-Wi-Fi | Зелёная | горит, твердый | Wi-Fi включен и работает нормально |
| от | Wi-Fi отключен или работает неправильно | ||
| Зелёная | горит, твердый | Доступна высокая мощность сигнала (21-31) | |
| Жёлтая | горит, твердый | Доступен средний уровень сигнала (11-20) | |
| Red | горит, твердый | Доступен низкий уровень сигнала (1-10) | |
| / | от | Нет сигнала |
| NET | Зелёная | горит, твердый | Соединение с сетью 4G установлено |
| Жёлтая | горит, твердый | Соединение с сетью 3G установлено | |
| Red | горит, твердый | Соединение с сетью 2G установлено | |
| / | от | Соединение с сетью не установлено или устанавливается | |
| SIM |
Зелёная |
горит, твердый | Основная карта используется |
| горит, мигает | Резервная карта используется | ||
| от | НЕТ SIM-карты |
Примечание: Вы можете выбрать тип отображения светодиода USR. Дополнительные сведения см. в руководстве по программному обеспечению RT123_SM_RobustOS. Сервис > Дополнительно > Система > Системные настройки > Тип пользовательского светодиода.
кнопка сброса
| Функция | Эксплуатация |
| Перезагружать | Нажмите и удерживайте кнопку RST в течение 2–5 секунд в рабочем состоянии. |
| Восстановить по умолчанию
конфигурация |
Нажмите и удерживайте кнопку RST в течение 5-10 секунд, светодиод RUN начнет быстро мигать, маршрутизатор вернется к настройкам по умолчанию.
конфигурации. |
| Восстановить завод
настройки по умолчанию |
После того, как операция восстановления конфигурации по умолчанию будет выполнена дважды в течение одной минуты, маршрутизатор вернется к заводским настройкам.
настройки по умолчанию. |
| Примечание. Более подробную информацию см. Руководство по программному обеспечению RT123_SM_RobustOS, 2.3 Сброс до заводских настроек. |
Порты Ethernet. Маршрутизатор R3000 Quad имеет 4 порта Ethernet с двумя светодиодными индикаторами. Желтый — индикатор соединения, зеленый — индикатор скорости. Подробнее о статусе см. в таблице ниже.
| Индикаторные | Статус | Описание |
| Индикатор ссылки | горит, твердый | Соединение установлено |
| горит, мигает | Данные передаются | |
| от | Соединение не установлено | |
| Индикатор скорости | горит, твердый | Режим 100 Мбит / с |
| от | Режим 10 Мбит / с |
Интерфейс USB
| Функция | Эксплуатация |
| Обновление прошивки | Интерфейс USB используется для пакетного обновления прошивки, но не может использоваться для отправки или получения данных от ведомых устройств, которые к нему подключены. Вы можете вставить USB-накопитель в USB-интерфейс маршрутизатора, например U-диск или жесткий диск. Если есть поддерживаемая конфигурация file или прошивку маршрутизатора на этом USB-накопителе, маршрутизатор автоматически обновит
конфигурация file или прошивка. Подробнее см. Руководство по программному обеспечению RT123_SM_RobustOS. |
Установка оборудования
- Установка SIM-карты. Ослабьте винты, прикрепленные к крышке, с помощью отвертки, а затем найдите слот для SIM-карты/карты Micro SD. Нажмите на карту пальцем, пока не услышите щелчок, а затем затяните винты, связанные с крышкой, с помощью отвертки. Установите крышку на место и затяните винты, прикрепленные к крышке, с помощью отвертки.

- Установка антенны. Поверните антенну в антенный разъем соответствующим образом.

- Установка монтажного комплекта. (Необязательный)

- Установка клеммной колодки. Вставьте клеммные колодки в разъем интерфейсов, затем можно подключить устройства или датчики к шлюзу через соответствующие интерфейсы, например, RS232/RS485, DIDO…

- Установка источника питания. Следуя цвету головы, подключите кабель с красной маркировкой к положительному полюсу через клеммную колодку, а желтый — к отрицательному таким же образом.

- Заземление устройства. Заземление поможет предотвратить шумовой эффект из-за электромагнитных помех (ЭМП). Перед включением питания подключите устройство к заземляющему проводу с помощью заземляющего винта.

- Подключить роутер к компьютеру. Подключите кабель Ethernet к любому порту с маркировкой ETH0~ETH3 в нижней части маршрутизатора, а другой конец кабеля подключите к компьютеру.


Вход в устройство
- Подключите порт Ethernet маршрутизатора к ПК с помощью стандартного кабеля Ethernet.
- Перед входом вручную настройте ПК со статическим IP-адресом в той же подсети, что и адрес шлюза, нажмите и настройте «Использовать следующий IP-адрес».

- Чтобы войти в шлюз web интерфейс, введите http://192.168.0.1 в URL поле вашего интернет-браузера.
- Используйте информацию для входа, указанную на этикетке продукта, когда будет предложено пройти аутентификацию.

- После авторизации открывается домашняя страница web отображается интерфейс, то вы можете view системную информацию и выполнить настройку устройства.

- Автоматический выбор APN включен по умолчанию. Если вам нужно указать собственный APN, перейдите в меню Интерфейс-> Диспетчер ссылок-> Настройка связи-> Настройки WWAN, чтобы завершить конкретную настройку.

- Дополнительные сведения о конфигурации см. в Руководстве по программному обеспечению RT123_SM_RobustOS. (КОНЕЦ)


- Клиентская поддержка: support@robustel.com
- Веб-сайт: www.robustel.com
- ©2022 Гуанчжоу Robustel Co., Ltd. Все права защищены. Может быть изменено без уведомления.
Документы / Ресурсы
 |
Промышленный сотовый маршрутизатор LTE R3000 с двумя SIM-картами [pdf] Руководство пользователя R3000, Промышленный сотовый маршрутизатор LTE с двумя SIM-картами, Сотовый маршрутизатор с двумя SIM-картами, Промышленный маршрутизатор LTE с двумя SIM-картами, Маршрутизатор с двумя SIM-картами, Маршрутизатор с SIM-картами, Маршрутизатор |
 |
Промышленный сотовый маршрутизатор LTE R3000 с двумя SIM-картами [pdf] Руководство пользователя R3000, Промышленный сотовый маршрутизатор LTE с двумя SIM-картами, R3000 Промышленный сотовый маршрутизатор LTE с двумя SIM-картами, Сотовый маршрутизатор LTE с двумя SIM-картами, Сотовый маршрутизатор с двумя SIM-картами, Маршрутизатор с двумя SIM-картами, Маршрутизатор |
Рекомендации

- Описание
- Характеристики
- Загрузить
- Протестировать
- Купить
Robustel R3000-3P — промышленный 3G роутер с двумя SIM-картами для UMTS/HSPA сетей.
Возможен заказ моделей с поддержкой Wi-Fi 802.11 b/g/n, GPS.
В наличии есть SDK (комплект средств разработки).
Надёжный 3G роутер R3000-3P предназначен для приёма/передачи данных по сотовым сетям в М2М системах.
Отличительные особенности
- Поддержка HSPA+
- Двойное резервирование SIM для непрерывной сотовой связи, поддерживает 3G
- Метод антенного разделения (Antenna diversity) для улучшения производительности передачи
- Два Ethernet порта, могут быть настроены как 2 LAN или 1 LAN – 1 WAN (поддерживает беспроводной WAN и резервирование по проводному WAN).
- 1x RS232, 1x RS485, 1 консольный порт, 2 цифровых входа, 2 цифровых выхода, 1 высокоскоростной USB до 480 Мбит/с.
- 6 индикаторов LED показывают статус в сети и интенсивность сигнала (RSSI).
- Широкий диапазон входного напряжения — от 12 до 70 В, и рабочих температур -40°С…+70°С.
- Металлический корпус с возможностью крепления на DIN-рейку или к стене, также с дополнительным заземлением.
- Сетевые протоколы PPP, PPPoE, TCP, UDP, DHCP, ICMP, NAT, DMZ, RIP, OSPF, DDNS, VRRP, HTTP, HTTPs.
- VPN туннелирование: IPSec/OpenVPN/PPTP/L2TP клиент/сервер, GRE.
- Управление: Web, CLI, SNMP, SMS, М2М-платформа Robustlink.
- Поддерживает Modbus/RTU в Modbus/TCP.
- Всегда «on-line», «пробуждение» по SMS или в течение заданного времени суток.
- Автоматическая перезагрузка с помощью SMS или в заданное время суток.
- Удалённое конфигурирование по SMS.
- Обновление ПО через Web-интерфейс.
Сферы применения
- Банкоматы и вендинг
- Системы солнечной и ветровой энергии
- Автоматизация
- Автоматическое считывание показаний измерительных приборов
- Промышленная автоматизация
- IP видео наблюдение
- Управление удалёнными устройствами.
| Параметр | Значение |
| Частотный диапазон, МГц | GSM/GPRS/EDGE/UMTS/HSPA GPRS/EDGE: 850/900/1800/1900 МГц HSPA+: 850/900/1900/2100 или 900/2100 или 850/1900 МГц опционально, |
| Интерфейсы | 2 SIM 2 Ethernet: 2 x 10/100 Мбит/с, 2 LAN или 1 LAN 1 WAN RS-232, RS-485 2 цифровых входа 2 цифровых выхода 6 индикаторов LED USB Антенный интерфейс SMA (f) |
| Сторожевой таймер (Watchdog) и часы реального времени (RTC) |
Да |
| Входное напряжение, В | 12…70 |
| Энергопотребление | режим покоя: 100 мА @ 12 В режим передачи данных: 500 … 1000 мА (в пике) @ 12 В |
| Дипазон рабочих температур | -40°С…+70°C |
| Размеры, мм | 125 x 108 x 45 |
| Вес, г | 500 |
| Гарантия | 1 год |
Robustel GoRugged R3000 User Guide
Important Notice
Due to the nature of wireless communications, transmission and reception of data can never be guaranteed. Data
may be delayed, corrupted (i.e., have errors) or be totally lost. Although significant delays or losses of data are rare
when wireless devices such as the router is used in a normal manner with a well-constructed network, the router
should not be used in situations where failure to transmit or receive data could result in damage of any kind to the
user or any other party, including but not limited to personal injury, death, or loss of property. Robustel accepts no
responsibility for damages of any kind resulting from delays or errors in data transmitted or received using the
router, or for failure of the router to transmit or receive such data.
Safety Precautions
General
The router generates radio frequency (RF) power. When using the router, care must be taken on safety issues
related to RF interference as well as regulations of RF equipment.
Do not use your router in aircraft, hospitals, petrol stations or in places where using cellular products is
prohibited.
Be sure that the router will not be interfering with nearby equipment. For example: pacemakers or medical
equipment. The antenna of the router should be away from computers, office equipment, home appliance, etc.
An external antenna must be connected to the router for proper operation. Only uses approved antenna with
the router. Please contact authorized distributor on finding an approved antenna.
Always keep the antenna with minimum safety distance of 20 cm or more from human body. Do not put the
antenna inside metallic box, containers, etc.
RF exposure statements
1.
For mobile devices without co-location (the transmitting antenna is installed or located more than 20cm
away from the body of user and nearby person)
FCC RF Radiation Exposure Statement
1.
This Transmitter must not be co-located or operating in conjunction with any other antenna or transmitter.
2.
This equipment complies with FCC RF radiation exposure limits set forth for an uncontrolled environment.
This equipment should be installed and operated with a minimum distance of 20 centimeters between the
radiator and human body.
Note: Some airlines may permit the use of cellular phones while the aircraft is on the ground and the door is open.
Router may be used at this time.
Using the Router in Vehicle
Check for any regulation or law authorizing the use of cellular devices in vehicle in your country before installing
the router.
The driver or operator of any vehicle should not operate the router while driving.
Install the router by qualified personnel. Consult your vehicle distributor for any possible interference of
electronic parts by the router.
The router should be connected to the vehicle’s supply system by using a fuse-protected terminal in the
vehicle’s fuse box.
Be careful when the router is powered by the vehicle’s main battery. The battery may be drained after extended
period.
RT_UG_R3000_v.4.0.0
Confidential
27 March, 2017
2/136