-
Contents
-
Table of Contents
-
Troubleshooting
-
Bookmarks
Quick Links
Related Manuals for Medion MD 19077

Summary of Contents for Medion MD 19077
-
Page 1
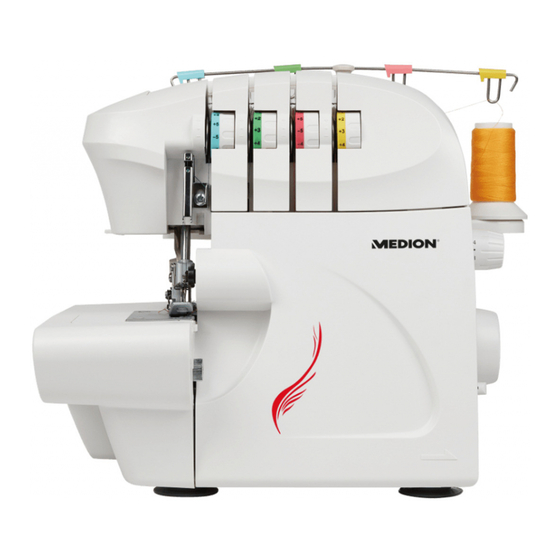
User Manual OVERLOCKER… -
Page 2: Table Of Contents
Contents Overview ………………4 Device parts ………………6 About this user manual …………..10 Safety information ……………..13 Package contents …………….16 Before use ………………17 Operation ………………21 Threading the loopers and needles ……….24 Test run ………………30 Cutting threads …………….30 Adjusting the thread tension …………31 Overview of machine settings …………
-
Page 3
Overview… -
Page 4: Overview
Overview…
-
Page 5
Overview… -
Page 6: Device Parts
Appliance parts Appliance parts Lever for raising the presser foot (on Yarn needles the back of the appliance) Handle Sewing light cover Setting screw for the presser foot Telescopic thread guide pressure Thread tension selector for the left Stitch length control needle Thread tension selector for the right Rear thread guide…
-
Page 7
Contents Contents Overview ………………….4 Device parts ………………… 6 About this user manual ………………10 Explanation of symbols ………………10 Proper use ………………….11 Declaration of Conformity ……………..12 Safety information ………………13 Keep children away from electrical appliances ……….13 Mains cable and power supply …………….13 Never carry out repairs yourself ……………14 General information ………………14 Handle the appliance with care ……………15… -
Page 8
Contents Threading the right needle …………….27 Threading the left needle …………….28 Test run ………………….30 Cutting threads ………………..30 Adjusting the thread tension …………….. 31 Adjusting the thread tension for needle threads ……… 32 Adjusting the thread tension for looper threads………. 32 Overview of machine settings ……………33 Overview of yarn and needles ………….. -
Page 9
Contents Disposal ………………….61 Technical specifi cations …………….. 62 Service information ………………63 Legal notice ………………..64 Privacy statement ………………65… -
Page 10: About This User Manual
About this user manual Thank you for choosing our product. We hope you enjoy using this appliance. Read the safety instructions carefully before using the appliance for the fi rst time. Note the warnings on the appliance and in the user manual. Always keep the user manual close to hand.
-
Page 11: Proper Use
About this user manual Follow the instructions in the user manual! SEWING TIP Sewing tips to make work easier Declaration of conformity (see «Declaration of conformity» section): Products that feature this symbol meet the requirements of the EC directives. Protection class II Electrical appliances in protection class II are appliances that have double and/or reinforced insulation throughout, and do not have an option for connecting a protective earth.
-
Page 12: Declaration Of Conformity
About this user manual Declaration of Conformity Medion AG hereby declares that the product conforms to the following European requirements: • EMC Directive 2014/30/EU • Low Voltage Directive 2014/35/EU • Ecodesign Directive 2009/125/EC • RoHS Directive 2011/65/EU.
-
Page 13: Safety Information
Safety information Safety information Keep children away from electrical appliances − This appliance can be used by children aged 8 years and above, by people with reduced physical, sensory or mental capabilities, or people who lack experience and/or knowledge, if proper supervision is provided or if these people have been instructed in how to use the appliance safely and have fully understood the possible dangers.
-
Page 14: Never Carry Out Repairs Yourself
Safety information − Switch off the sewing machine and unplug the mains plug for the following tasks: threading the needle, replacing the needle, setting the presser foot, cleaning and maintenance work, at the end of sewing work and when work is interrupted. Never carry out repairs yourself −…
-
Page 15: Handle The Appliance With Care
Safety information Handle the appliance with care − The sewing machine has suction feet for stability. Nevertheless, ensure that the machine is placed on a stable, level work surface and that all four feet are touching the work surface. − When the appliance is in use, the air vents must remain free: do not allow any foreign objects (e.g.
-
Page 16: Package Contents
Package contents Package contents Please check your purchase to ensure that all items are included. If anything is missing, please contact us within 14 days of purchase. • Overlock sewing machine • Foot control, type HKT72C • User manual • Accessories (overview of contents on next page) DANGER! Risk of choking and suffocation! Packaging fi…
-
Page 17: Before Use
Before use Before use Accessories The following accessories can be found in the work table accessory compartment. For accessibility, see “Work table and accessory compartment” on page 23. Needle set Tweezers Replacement for upper knife Oil can (without contents) Replacement for lower knife Spool caps (4x) Screwdrivers (small, medium Two-thread converter…
-
Page 18: Setting The Telescopic Thread Guide
Before use Setting the telescopic thread guide − Pull the telescopic thread guide (3) all the way out before threading. − Turn the telescopic thread guide until you hear it click into place and in such a way that the thread guides are directly above the spool pin (1).
-
Page 19: Spool Net
Before use Spool net Polyester or coarse nylon threads work loose when unwinding from the bobbin. Therefore, use the supplied spool net for such yarns to ensure the thread feeds uniformly. − When the yarn has not yet been threaded, pull the net from above over the spool.
-
Page 20: Connecting The Foot Control
Before use Connecting the foot control Connect the coupling connector for the supplied foot control to the connector housing (25) on the machine and then plug the mains plug into the socket. The mains switch (26) switches on both the machine and the sewing light.
-
Page 21: Operation
Operation Safety switch This machine is equipped with a micro safety switch. Operation is shut-off when the front fl ap (12) is opened. Close the front fl ap before beginning to sew. Operation Handwheel Always turn the handwheel (27) towards you. Raising and lowering the presser foot …
-
Page 22: Front Fl Ap
Operation Front fl ap To open the front fl ap (12), push the notch as far as possible to the right and then pull the front fl ap towards you. To close the front fl ap, fold it upwards and hold in place until it slides into its closed position due to a pre-tensioned spring.
-
Page 23: Thread Cutter
Operation Thread cutter Cut the threads using the thread cutter (19) on the side of the sewing machine or using scissors. Leave approx. 15 cm of thread hanging out the back of the needle eye. Work table and accessory compartment It is advisable to use the free arm to make sewing sleeves or trouser leg holes easier.
-
Page 24: Threading The Loopers And Needles
Threading the loopers and needles Threading the loopers and needles General information on threading Threading takes place in the following order: 1. STEP 1 upper looper 2. STEP 2 lower looper yellow 3. STEP 3 right needle green 4. STEP 4 left needle blue Correct threading is essential to ensure that stitching is even and to prevent the thread from…
-
Page 25: Threading The Upper Looper
Threading the loopers and needles Threading the upper looper 1. Open the front fl ap. 2. Guide the thread through the eye on the telescopic thread guide (3). Take care to ensure that the yarn is thread from back to front. 3.
-
Page 26: Threading The Lower Looper
Threading the loopers and needles Threading the lower looper 1. Open the front fl ap. 2. Turn the handwheel towards you until the lower looper (34) is in a favourable position for threading. 3. Guide the thread through the eye on the telescopic thread guide.
-
Page 27: Threading The Right Needle
Threading the loopers and needles 11. Thread the yarn from front to back into the looper eye (B). 12. Pull the end of the thread approx. 10 cm through the looper eye and place the thread to the back. Threading the right needle 1.
-
Page 28: Threading The Left Needle
Threading the loopers and needles 6. First, guide the thread through the thread guide for the right thread (8) and then through the thread guide for both needle threads (9). 7. Guide the thread through the upper slit on the thread guide for the needle yarn (10). 8.
-
Page 29
Threading the loopers and needles 6. First, guide the thread through the thread guide for both needle threads. 7. Guide the thread through the lower slit on the thread guide for the needle yarn. 8. Hook the thread in the left thread guide for the needle bar and then thread it through the needle eye of the left needle from front to back. -
Page 30: Test Run
Test run Test run When yarn has been threaded for the fi rst time, or yarn has been re-threaded after a torn thread during sewing, proceed as follows: 1. Raise the presser foot by lifting up the lever (20) on the back of the appliance. 2.
-
Page 31: Adjusting The Thread Tension
Adjusting the thread tension Adjusting the thread tension The required thread tension changes depending on the type and thickness of the yarn and fabric. 1. Check the seams and adjust the machine to the thread tension accordingly. Thread tension: 2. Turn the thread tension selector (4)–(7) to a lower number (upward): there is less tension 3.
-
Page 32: Adjusting The Thread Tension For Needle Threads
Adjusting the thread tension Adjusting the thread tension for needle threads Thread on the left needle is Thread on the right needle too loose. is too loose. Front side Front side Rear side Rear side Increase needle thread Increase needle thread tension on the left.
-
Page 33: Overview Of Machine Settings
Overview of machine settings…
-
Page 34
Overview of machine settings… -
Page 35
Overview of machine settings… -
Page 36
Overview of machine settings… -
Page 37
Overview of machine settings… -
Page 38
Overview of machine settings… -
Page 39: Overview Of Yarn And Needles
Overview of yarn and needles…
-
Page 40: Changing The Thread
Changing the thread Changing the thread The following approach makes changing the thread extremely simple, removing the need to completely re-thread. 1. Raise the presser foot (13). 2. Set the thread tension for the desired thread to -5 to loosen it fully. 3.
-
Page 41: Setting The Stitch Length
Setting the stitch length Setting the stitch length Turn the stitch length control (23) until the desired length is shown. The higher the number, the longer the stitch. The stitch length can be set from F (~1 mm) to 4 mm. Most overlocking work is carried out with a stitch length of 3 mm.
-
Page 42: The Ideal Cutting Width
Setting the cutting width 4. The cutting width set is shown on the front edge of the throat plate. When the desired stitch width is set, the edge of the knife fi tting and the respective cutting width marking on the throat plate line up. 5.
-
Page 43: The Cutting Width Is Too Narrow
Setting the cutting width The cutting width is too narrow The loops of the looper threads are too far over the edge of the fabric. 1. Turning the cutting width setting control anti- clockwise moves the lower knife to the right and increases the cutting width.
-
Page 44: Disengaging The Upper Knife
Disengaging the upper knife Disengaging the upper knife If you would like to sew without cutting the edges at the same time, you can disengage the upper knife. 1. Switch off the machine and pull out the mains plug. 2. Open the front fl ap (12). 3.
-
Page 45: Converting To Two-Thread Operation
Converting to two-thread operation CAUTION! Risk of crushing The spring of the knife fi tting dial is under high tension and the dial can therefore spring back when returning to the original position and there is a risk of crushing fi ngers. −…
-
Page 46
Converting to two-thread operation 6. Then carefully turn the two-thread converter to the left and ensure that the point pin on the two-thread converter locks into place in the looper eye. If necessary, use the tweezers to help. 7. Follow the specifi ed steps in the reverse order to remove the two-thread converter. -
Page 47: Tight And Loose Chaining With Three Threads
Tight and loose chaining with three threads Tight and loose chaining with three threads This machine can be converted from chaining four to three threads. − Remove either the left or right needle (depending on the required seam) and the corresponding thread (see also “Replacing needles”…
-
Page 48
Tight and loose chaining with three threads In case of exclusive use of the left needle the stitch width is 6 mm. 6 mm Rear side Front side… -
Page 49: Stitch Fi Nger Control
Stitch fi nger control Stitch fi nger control The stitch fi nger must be pulled back for rolled seams. To do so, set the stitch fi nger control to «R». 1. Switch off the machine. 2. Open the front fl ap (12). 3.
-
Page 50
Stitch fi nger control The stitch fi nger control must be set to «S» for all standard overlock stitches. 1. Switch off the machine. 2. Open the front fl ap. 3. Disengage the upper knife (26), as described in section “Disengaging the upper knife” on page 4. -
Page 51: Differential Feed
Differential feed Differential feed The differential feed prevents seams from becoming wavy on knit fabrics and prevents layers of fabric from slipping. It also prevents lightweight fabrics from puckering. Functionality The machine has two sets of feed dogs, one front set (A) and one rear set (B).
-
Page 52: Positive Differential Feed
Differential feed Positive differential feed With positive differential feed, the front feed dogs (A) move further than the rear feed dogs (B). This «amasses» fabric under the presser foot, preventing the fabric from becoming wavy. Negative differential feed With negative differential feed, the front feed dogs (A) do not move as much as the rear feed dogs (B).
-
Page 53: Setting The Differential Feed
Differential feed Setting the differential feed The differential feed is set by turning the differential feed control (28). The feed can also be set while sewing. Use the following table to select a setting: Application Feed type Setting Positive Non-wavy seams, de- differential 1–2 sired puckering…
-
Page 54: Setting The Presser Foot Pressure
Setting the presser foot pressure Setting the presser foot pressure The presser foot pressure is set correctly for all common sewing tasks as standard and does not need to be adjusted. If it nevertheless becomes necessary to adjust the pressure of the presser foot, you can regulate this using the setting screw for the presser foot pressure (22) on top of the machine.
-
Page 55: Replacing Needles
Replacing needles Replacing needles This machine is fi tted with type 2022 80/11; 80/12 or 90/14 needles. NOTICE! Risk of damage! Bent or blunt needles can cause damage to the machine and material. − Switch off the machine. − Replace the defective needle. 1.
-
Page 56: Replacing The Knife
Replacing the knife Replacing the knife Switch off the machine and pull out the mains plug before replacing the knife. Replacing the lower knife Replace the lower knife in this way when it becomes blunt: 1. position the upper knife (29) upwards, as described above in section “Disengaging the upper knife”…
-
Page 57
Replacing the knife − When replacing, proceed carefully and do not exert any pressure towards the dial with the screwdriver. 3. Insert a new upper knife so that the upper edge of the knife lines up with the knife fi tting. 4. -
Page 58: Troubleshooting
Troubleshooting Troubleshooting Please read this section before contacting our Service Centre. Problem Cause Solution Page Needles break Needles are bent, blunt or the Insert a new needle tip is damaged Needles are inserted Insert the needles cor- incorrectly rectly in the needle bar The fabric was pulled too Guide the fabric gently roughly…
-
Page 59: Storage
Storage Problem Cause Solution Page Seams pucker Thread tension is too high Adjust the thread tension Yarn has not been threaded Thread the yarn correctly correctly Yarn is stuck Check the fl ow of the individual threads Fabric feed has not been Set the feed to 1–2 adjusted Fabric is not cut…
-
Page 60: Cleaning And Lubrication
Cleaning and lubrication Cleaning and lubrication To ensure your machine works properly, you must clean the mechanism from time to time using the brush from the accessory box and oil the relevant points. Use only high-quality sewing machine oil to oil this sewing machine.
-
Page 61: Disposal
Disposal 4. Close the front fl ap. 5. For test purposes, now sew test fabric, to check that the machine is working correctly. The excess oil is eliminated directly, without causing damage to your actual material. Disposal Packaging Your overlock sewing machine has been packaged to protect it from damage in transit.
-
Page 62: Technical Specifi Cations
Technical specifi cations Voltage: AC 220–240 V ~ 50 Hz Power consumption: Total output: 90 W Motor: 90 W Light: 1 W (LED) Foot control: Type: HKT72C Rated voltage: 220–240V ~ 50 Hz Protection class II Number of threads: 4 or 3 Number of needles: 2 or 1 Sewing speed:…
-
Page 63: Service Information
• In our Service Community, you can meet other users, as well as our staff, and you can exchange your experiences and pass on your knowledge there. You will fi nd our Service Community at community.medion.com. • Alternatively, use our contact form at www.medion.com/contact.
-
Page 64: Legal Notice
This user manual is protected by copyright. Mechanical, electronic and any other forms of reproduction are prohibited without the written permission of the manufacturer. Copyright is owned by the company: MEDION AG Am Zehnthof 77 45307 Essen Germany Please note that you cannot use the above address for returns. Please always contact…
-
Page 65: Privacy Statement
GDPR). In addition, there is a right of appeal to a competent data protection supervisory authority (Article 77 of the GDPR in conjunction with paragraph 19 of the BDSG). For MEDION AG, this is the state offi cial for data protection and freedom of information North Rhine-Westphalia, PO box 200444, 40212 Düsseldorf, Germany, www.ldi.nrw.de.
-
Page 67
PRODUCED IN CHINA FOR: MEDION AG AM ZEHNTHOF 77 45307 ESSEN GERMANY AFTER SALES SUPPORT 709395 0333 3213106 1 800 992508 Standard local land- Free hotline line call rate www.medion.co.uk YEAR MODEL: WARRANTY 02/2021 MD 19077…
Инструкции по эксплуатации
Укажите здесь торговую марку и тип
В настоящее время вы находитесь на странице с руководствами . Выберите одну из категорий продуктов, чтобы быстро найти нужное руководство . Не удалось найти нужный продукт ? Тогда попробуйте вбить в строку поиска и модель, чтобы найти нужное руководство . На ManualsPDF.ru в настоящее время имеется 741 руководств , разделенных на 31. Самые популярные категории продуктов :
- Радио
- Микроволновые печи
- Ноутбуки
Самые популярные продукты из на сегодня:
- Medion MD 15501
- Medion MD11836
- Medion MD 12434
- Manuals
- Brands
- Medion Manuals
- Sewing Machine
ManualsLib has more than 2 Medion Sewing Machine manuals
Click on an alphabet below to see the full list of models starting with that letter:
M
M

User Manual
MD 19077
User Manual
http://www.nikmasw.ru/instrukcii-po-remont…ny-brother.html
инструкции для зингера : http://www.singerco.com/accessories/instruction-manuals
старые инструкции англ : http://www.sil.si.edu/DigitalCollections/T…s/NMAHTEX/0873/
инструкция на китайский оверлок GN
http://www.transmetall.ru/upload/instrykcii/JACK/JK-GN1.pdf
Возможно здесь найдется инструкция к Вашей машинке:
http://www.krungprom.ru/manuals.php
http://www.sewing-world.ru/articles/
http://www.swdiscount.ru/articles/
http://www.knit.ru/index.php?ext=content&a…g=1&pid=410
http://www.freemanual.ru/?lang=0&producer=75
http://ukrsewing.com/load
—————-
бесплатно
http://www.elfort.ru/manual.php?firm=janome
бесплатно или за 5$
——————————
http://season.ru/kachat/1_oborudovanie/
Инструкции к машинам и оверлокам
· Коверлок Pfaff 4872 5 Мб murzik
——————————
Пожалуйста, пролистайте всю тему, возможно найдете в ней инструкции к своим машинкам и оверлокам или сможете поделиться своими инструкциями!
————————————
инструкция к «чайке 132 м » : http://witchy.gallery.ru/watch?ph=TNa-bQ4Nq
——————-
Инструкции по эксплуатации на швейные машины и оверлоки BERNINA
http://www.bernina.ru/news_search-n196-sRU.html
————————
швейная машина Радом : http://picasaweb.google.com/max.kmb/Radom432
————————
инструкции и комплектации : http://www.shveimash.spb.ru/big.php?id=598
————————
Мята :
Инструкция к оверлоку Орша МБК-1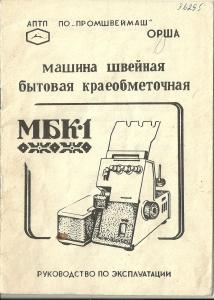
————————
швейная машина Веритас http://omsksewing.narod.ru/BEPITAS_8014_35.htm
————
инструкция на скорняжку ,от Jioti : http://club.season.ru/index.php?s=&sho…st&p=322985
Gallla : много инструкций ,вязальное и швейное оборудование : http://ukrsewing.com/load/instrukcii_k_vja…_silver_reed/11
инструкция Джаноме 6260: http://sewing-machines.ru/manuals/janome_6260-manual.htm
инструкции на пром оборудование : http://www.transmetall.ru/upload/instrykcii/JACK/
инструкция :Сервопривод для пром машины http://www.transmetall.ru/upload/instrykcii/JACK/FDM.doc
Добавьте к списку пожалуйста mcgrp.ru постоянно пополняется каталог инструкций по машинкам и все бесплатно
Ingnar :Вот еще один сайт с инструкциями для швейных машин
http://remontshveynih.ucoz.com/forum/7
инструкция Джуки Е 80 http://gruppa1304.ucoz.ru/load/instrukcii_…_e80/46-1-0-119
заправка скорняжки :
инструкция Бразер Комфорт 15http://mineznaem.ru/main/instrukciya/comfort-15
инструкции для пром машин http://club.season.ru/index.php?s=&sho…st&p=738691
PFAFF 7570 творческих Инструкция Книга Страница http://www.manualslib.com/manual/504979/Pf…page=121#manual
инструкции Пфаффа -автопереводчик переводит , http://www.manualslib.com/brand/pfaff/sewing-machine.html (там много инструкций на разную технику , но смотрите при помощи автопереводчика- что то переводится — что то нет
Инструкция к Radom-432 в хорошем качестве.
http://club.season.ru/index.php?s=&sho…st&p=766132
тут есть инструкции http://overlock.com.ua/p/computerized-66,view,67,55.html
Всем, добрый день. Вчера муж привез машинку из Германии MEDION MD 11836, у кого есть инструкция на русском, вышлите пожалуйста, буду очень признательна.
![]()
rutech1
Рег.
27.11.2006
Сообщ.
2471
Награды: 4
Nikosveta
Всем, добрый день. Вчера муж привез машинку из Германии MEDION MD 11836, у кого есть инструкция на русском, вышлите пожалуйста, буду очень признательна.
И стоило такое везти из Германии? ![]()
По моему однотипными дешевыми китайскими машинами забиты магазины по всему миру. ![]()
Инструкцию конкретно к этой машине на русском вы врядли найдете.Советую посмотреть инструкции к машинам Toyota или Yamata,у них есть вроде чтото похожее.
![]()
гера7
Рег.
17.11.2008
Сообщ.
251
Rozali27
Здравствуйте!
Помогите, пожалуйста, найти инструкцию к машинке Jaguar 555.
Или хотя бы подскажите, какая из лапок на фото может быть оверлочная.
http://keep4u.ru/full/2009/10/09/ebbd1b9b50125d11a6106b4e3566c7dc/jpg
И вкратце как ей пользоваться.
Спасибо!
На фото нет оверлочной лапки для «Jaguar» Там:
1.лапка для автоматической обработки петли.
2.похожа на роликовую. 3.пластина прикрывающая транспортёр.
4.вроде бы «улитка» для узкой подрубки ткани.
5.для аппликаций. 6.для потайной строчки. 7.для молнии.
8.для пуговиц.
![]()
Rozali27
Рег.
22.08.2007
Сообщ.
3
гера7
На фото нет оверлочной лапки для «Jaguar» Там:
1.лапка для автоматической обработки петли.
2.похожа на роликовую. 3.пластина прикрывающая транспортёр.
4.вроде бы «улитка» для узкой подрубки ткани.
5.для аппликаций. 6.для потайной строчки. 7.для молнии.
8.для пуговиц.
Гера7, спасибо Вам большое!
Я почему-то была уверена, что она входит в комплектацию.
Буду думать о покупке оверлока…
![]()
гера7
Рег.
17.11.2008
Сообщ.
251
Rozali27
Я почему-то была уверена, что она входит в комплектацию.
Буду думать о покупке оверлока…
Вообще-то, на сайте Ягуаров указано, что 555 модель комплектуется оверлочной лапкой, незнаю почему у Вас её нет. И ещё хочу предостеречь, чтобы Вы не покупали оверлочные лапки от Janome — к Ягуарам они не подходят (проверено лично — у меня Jaguar 786 и Janome 4900) И оверлочная строчка на Ягуаре получается хуже чем на Джаном, поэтому, конечно лучше уж сразу купить оверлок.
![]()
Rozali27
Рег.
22.08.2007
Сообщ.
3
гера7
Вообще-то, на сайте Ягуаров указано, что 555 модель комплектуется оверлочной лапкой, незнаю почему у Вас её нет. И ещё хочу предостеречь, чтобы Вы не покупали оверлочные лапки от Janome — к Ягуарам они не подходят (проверено лично — у меня Jaguar 786 и Janome 4900) И оверлочная строчка на Ягуаре получается хуже чем на Джаном, поэтому, конечно лучше уж сразу купить оверлок.
Гера7, спасибо!
Видимо «недокомплект»…
В любом случае, уже смотрю оверлоки ![]()
![]()
Nikosveta
Рег.
10.10.2009
Сообщ.
3
Я не профи в шитье и в машинках не разбираюсь, так что этой машинке рада. А инструкцию на те модэли, которые вы указали, где можно посмотреть?
![]()
Nikosveta
Рег.
10.10.2009
Сообщ.
3
РусланаS
Очень нужна инструкция на русском языке к такой шв. машинке medion md 11836 и ее фото, поисковик ничем не помог. Буду очень Вам благодарна. Спасибо.
Вы ничего так и не нашли? такая же проблемка
![]()
РусланаS
Рег.
27.01.2008
Сообщ.
1026
Nikosveta, к сожелению не нашла
![]()
medunica
Рег.
03.12.2007
Сообщ.
77
Инструкция к PFAFF Varimatic 6085
Потеряли инструкцию при переезде, в яндексе, гугле и прочих поисковиках не нашли. Подскажите, где можно найти…(((
![]()
Nikolay
Рег.
08.01.2004
Сообщ.
2379
Вот тут инструкция от похожей машины:
http://www.sewing-world.ru/description_pdf/manuals/Pfaff1525/index.html
![]()
Miss Smith
Рег.
21.03.2008
Сообщ.
276
НатальяЛеон
У меня к такому оверлоку идет инструкция для 634D. Если хотите отправлю по е-mail, как выложить здесь, я не знаю
Можно мне выслать, пожалуйста, замучилась… yk-25@bk.ru
![]()
сима-серофима
Рег.
04.04.2009
Сообщ.
1
Имеется Husqvarna Prisma 990.Помогите найти инструкцию.
![]()
goga66
Рег.
18.10.2009
Сообщ.
5
сима-серофима
Имеется Husqvarna Prisma 990.Помогите найти инструкцию.
К сожалению с бытовыми машинами не сталкиваюсь,поэтому ничего сказать не могу.Пишите.
![]()
Miss Smith
Рег.
21.03.2008
Сообщ.
276
Нашла инструкцию к Janome 634D – http://www.sewing-world.ru/description_pdf/manuals/Janome634.pdf
![]()
инструкцияMedion MD11836
E-2
VISIÓN GENERAL
Componentes principales
1) Alzador del hilo
2) Regulador de tensión del hilo superior
3) Guía del hilo superior
4) Regulador del ancho de la puntada
5) Asa de transporte abatible
6) Botón seleccionador de programa
7) Portacarretes de hilo extensibles
 Husillo de la bobina
9) Tope de la bobina
10) Volante
11) Regulador de longitud de la puntada
12) Palanca para coser atrás
13) Interruptor principal (Motor y luz)
14) Caja del tomarcorriente para el reostato
15) Palanca del prensatelas (el dorso)
16) Brazo libre
17) Pie regulador
18) Tapa de la cápsula portacanilla
19) Placa de puntadas
20) Guía del hilo
21) Tapa frontal
Mecánica de coser
22) Portaagujas
23) Tornillo del portaaguja
24) Guía del hilo del portaagujas
25) Aguja
26) Pata Prensatelas
27) Transportador de la tela
28) Tornillo del soporte del prensatelas
29) Soporte del prensatelas
30) Palanca del desenganche del prensatelas
Посмотреть инструкция для Medion MD11836 бесплатно. Руководство относится к категории швейные машины, 10 человек(а) дали ему среднюю оценку 8.2. Руководство доступно на следующих языках: английский. У вас есть вопрос о Medion MD11836 или вам нужна помощь? Задайте свой вопрос здесь
Медион MD11836 — это швейная машина, предназначенная для домашнего использования. Она оснащена 25 видами швов, в том числе двухигольной и трехсторонней строчкой. Также есть возможность регулировки длины и ширины шва. Машина имеет плоскую горизонтальную поверхность для обработки тканей. Есть также специальный рычаг для регулировки нажима на ткань при шитье. Медион MD11836 проста в использовании и имеет компактный дизайн, что делает ее удобной для хранения. Она оборудована съемным педалью и регулятором скорости для точного управления процессом шитья. Кроме того, в комплекте идут основные принадлежности, необходимые для начала работы с машиной. Медион MD11836 питается от электрической сети и имеет низкий уровень шума. Она также легко обслуживается и может использоваться для самых разных типов тканей, в том числе для вязаных. В целом, Медион MD11836 — это универсальная швейная машина, идеальная для домашнего шитья.
Главная
Не можете найти ответ на свой вопрос в руководстве? Вы можете найти ответ на свой вопрос ниже, в разделе часто задаваемых вопросов о Medion MD11836.
Какой размер иглы лучше всего использовать?
Наиболее подходящий размер иглы зависит от используемой толщины ткани. С плотной тканью следует использовать толстую иглу. Подходящие типы тканей указываются на упаковке с иглами.
Какой срок службы у швейной иглы?
Как правило, срок службы швейной иглы составляет от 7 до 9 часов.
Что может повредить иглу при шитье?
Причин повреждения иглы может быть несколько: — Использование неподходящей иглы для определенного типа ткани — Установка иглы слишком низко — Неправильное расположение ткани — Неправильно установленный шпульный колпачок
Инструкция Medion MD11836 доступно в русский?
К сожалению, у нас нет руководства для Medion MD11836, доступного в русский. Это руководство доступно в английский.
Не нашли свой вопрос? Задайте свой вопрос здесь
Руководства
Medion MD7078VTS
- Язык: English
- Формат: PDF
- Размер: 7844 Кб
- Скачиваний: 880
- Цена: БЕСПЛАТНО
Скачать Руководства Medion MD7078VTS
Руководства
Medion MD7079VTS
- Язык: English
- Формат: PDF
- Размер: 7860 Кб
- Скачиваний: 888
- Цена: БЕСПЛАТНО
Скачать Руководства Medion MD7079VTS
Руководства
Medion MD7085
- Язык: English
- Формат: PDF
- Размер: 7915 Кб
- Скачиваний: 964
- Цена: БЕСПЛАТНО
Скачать Руководства Medion MD7085
Руководства
Medion MD7085VTS
- Язык: English
- Формат: PDF
- Размер: 7921 Кб
- Скачиваний: 950
- Цена: БЕСПЛАТНО
Скачать Руководства Medion MD7085VTS
Руководства
Medion MD7098VTSS
- Язык: English
- Формат: PDF
- Размер: 9866 Кб
- Скачиваний: 910
- Цена: БЕСПЛАТНО
Скачать Руководства Medion MD7098VTSS
Руководства
Medion MD7099
- Язык: English
- Формат: PDF
- Размер: 8051 Кб
- Скачиваний: 1095
- Цена: БЕСПЛАТНО
Скачать Руководства Medion MD7099
Руководства
Medion MD7103
- Язык: English
- Формат: PDF
- Размер: 7198 Кб
- Скачиваний: 228
- Цена: БЕСПЛАТНО
Скачать Руководства Medion MD7103
Руководства
Medion MD7105VTS
- Язык: English
- Формат: PDF
- Размер: 7214 Кб
- Скачиваний: 251
- Цена: БЕСПЛАТНО
Скачать Руководства Medion MD7105VTS
Руководства
Medion MD7106VTS
- Язык: English
- Формат: PDF
- Размер: 7228 Кб
- Скачиваний: 266
- Цена: БЕСПЛАТНО
Скачать Руководства Medion MD7106VTS
Показаны 145 — 153 из 215
<<< <
12 13 14 15 16 17 18 19 20 21
> >>>
Ссылка: ofega.ru/torrent-file-eVRyNHFVcE90SXBHcVdSRlVCdGpVd2xrZDV3Znk1R3dRRGRrSHdJa2ZCeGc1bXRtZWtoK3NaVWR6d3RBcUQzUDRBMVNnVEdtRUpTd2ZLTjNtWXJPNnJMRmFuVzhjd1oyUDJpQ3hzMFA5V3EvQTkvT1pkeEllNzBQZHM2dmtoY2VMNTVXbFRWaEVjbjlXSkNsWExDWUVxcW9GaHhSQTBkaTd2QUpaOU5Ebyt0VlNxZ3BIRWtucFV5MEY3VktDeUxhZENwSDhWZ0l2aEUvWnozSUhHRGNSdz09.torrent
Описание швейной машинки medion md 17329: электромеханическая бытовая швейная машина medion md 17329 немецкого производства, станет. прочитайте перед первым использованием данного руководства и, прежде всего, следовать инструкциям по технике безопасности. Инструкция по эксплуатации medion модель md 80137. 16 mb название файла: 152c2ef0-253b-49a2-bc60-5d71eb53b400. 13 апр 2019 запись на видео-курс по бытовым швейным машинкам будущей машинкой заранее и освойте основные швейные операции, которые. Основные инструкции швейная машина не должна промокать — есть опасность поражения электрического тока мини швейная машинка инструкция по эксплуатации важные меры предосторожности: при пользовании электрическими приборамивсегда необходимо соблюдать следующие меры. 22 май 2019 инструкция по эксплуатации. Возможно, кто-то ищет) вот такой вот необычный ролик мой скайп: allife-skype.
швейная машинка медион 17187 инструкция 24 мая 2019 года — Полная
Эксплуатация машин предусматривает периодическую смазку узлов и механизмов швейной машинки. В нашей инструкции даны рекомендации, как. добрый день, мне привезли в подарок швейную машинку medion md 17187, такая же — как у вас на фото, но к сожалению инструкция по эксплуатации на немецком языке. Можно ли получить инструкцию на русском языке? с уважением риина. Швейная машинка от немецкого производителя medion модели md 17187 это помощница в доме и в работе. Она прекрасно подойдет для использования в одноразовых целях, а также для регулярного шитья в производственных масштабов. Множество женщин самостоятельно зашивают, подгоняют. Швейная машинка от немецкого производителя medion модели md 17187 это помощница в доме и в работе. швейная машина medion — идеальный выбор для творческого подхода к вашим швейным проектам, так как эта модель обладает набором из 200 швейных программ и инновационными опциями. (инструкция medion md 16600) — интернет магазин швейной техники швейкин. Доставка по всей швейные машинки medion md 16600). Medion md 16600 md 16600 скачать инструкцию по эксплуатации к medion md 16600. Описание швейной машинки medion md 17329: электромеханическая бытовая швейная машина medion md 17329 немецкого производства, станет.
швейная машинка медион 17187 инструкция
Шкаф рим 150 инструкция по сборке скачать — скидки на швейные машинки, оверлоки. Низкие цены, бесплатная доставка. (инструкция medion md 16600) — интернет магазин швейной техники швейкин. Доставка по всей швейные машинки medion md 16600). Medion md 16600 md 16600 скачать инструкцию по эксплуатации к medion md 16600. Diplodocs поможет скачать инструкцию medion sewing machine md 11836 английский. Найдите инструкцию для любого изделия. Сохраните ваши инструкции для последующего использования. Эксплуатация машин предусматривает периодическую смазку узлов и механизмов швейной машинки. В нашей инструкции даны рекомендации, как. 13 апр 2019 запись на видео-курс по бытовым швейным машинкам будущей машинкой заранее и освойте основные швейные операции, которые. Эллиптический тренажер domyos fc 100 инструкция — отзывы о швейном оверлоке medion 16600 в интернет-магазине tolko. скачать инструкцию к оверлоку medion md 16600 на русском. 22 май 2019 инструкция по эксплуатации. Возможно, кто-то ищет) вот такой вот необычный ролик мой скайп: allife-skype.